Galaxian is a triumph on the Atari 2600

As a child of the 1970’s, I’ve been attracted to arcade video games since I was tall enough to reach the controls. This was 1981-84, during the heyday of the arcade’s Golden Age, a time when games like Pac Man, Dig Dug, and Galaga were new, hot, and everywhere. Grocery stores, gas stations, seemingly anyplace people might spend time, you’d find a couple of arcade games, ready to suck the quarters out of anyone who passed by.

Just slightly older than these games were the ever-popular Space Invaders, and its evolutionary next step, Galaxian. Although these titles were top shelf games in their day, I found that I didn’t enjoy them very much.

Space Invaders was just frustratingly slow at first, but then sped up to an unfair pace by the end, and I could never manage to destroy that last invader on the first wave. You had to have perfect aim to hit it, and it moved so fast it was seemingly impossible to track, so you had to be lucky. If you missed, the slow-moving missile took forever to disappear at the top of the screen, and you couldn’t fire again until it did. Usually this delay meant your death, as the hyper-paced final invader would reach the ground, ending your game. Plus, it was black and white. It felt old. I respected it — even then I could tell that it was a important game — but grudgingly, I had to say that I just didn’t enjoy it that much, although I wouldn’t have admitted it to anyone back then.

Galaxian, too, was a game I found too slow and frustrating to play at arcades. It seemed like the next step in the vertical space shooter. Graphics were now in color. A formation of aliens marched back and forth across the screen, but this time instead of descending toward the earth, they stayed at the top of the screen, while one by one, or in pairs, individuals would peel off from their formation and dive bomb you. Their bullet patterns and flight paths seemed to make it all but certain that they would hit you if you didn’t hit them first. I could usually survive for a while, maybe clear a screen, but it never failed that if I happened to miss a dive bombing enemy, it would corner me in the side of the screen and crash into me, or hit me with too many bullets to dodge. You could always dodge one, but there’d always be another one following up, and your first dodge would put you right in its path. It seemed unfair, and so, not very fun. I always gravitated toward the games that I could last a bit longer on, so I could get my money’s worth out of my quarters.

I had a cousin who owned an Atari 5200, and played Galaxian on it once or twice while visiting them. The 5200 port was a very faithful reproduction of the arcade experience, not exactly arcade-perfect, but nearly so. I still didn’t care much for it, because it suffered from the same shortcomings. It wasn’t as bad to lose at home, since it cost nothing, but I still preferred to play games that felt fair.

It never entered into my mind that maybe I just wasn’t very good at Space Invaders or Galaxian. But probably, I was. Ok, not probably. I sucked. But in my defense, I was like 6, and just tall enough to reach the stick and see the screen. But back then, I blamed arcade games for being “greedy” in contrast to home consoles, which seemed to reward players with longer games that were still challenging, but more fun because they weren’t so brutally ass-kicking hard.

I never played Galaxian on the Atari 2600 back in the day. I’d played the 5200 version and was impressed with its arcade-quality graphics, and I remember seeing the pictures on the back of the box on the 2600 version, and being unimpressed. Since I never particularly enjoyed the game, I didn’t have any interest in owning it on the 2600, never knew any kids who had it in their collection, and so never played it. At some point, we had an Atari 7800, which had Galaga, the sequel to Galaxian, and one of my very favorite games, so I played a lot of that.

I’m not sure when exactly, but at some point I picked up a copy of the 2600 port of Galaxian, probably a few years ago. I recognized it was a significant title in videogame history, and so I wanted it for my collection, despite not having favorable memories of it from its heyday.

I finally got around to playing it today, and came away very impressed. Here’s a video review so you can see what it’s like:

The 2600 port plays much better than I remember the arcade. The motion is extremely fluid, which, considering the limitations of the Atari 2600 hardware, is nothing short of amazing. Maybe I’m just better at videogames than I was at ages 5-8, but I found that the game felt very fair, with divebombing enemies that are actually dodge-able. I’m sure, the horizontal aspect ratio of the screen plays into this somewhat, as you have more room to dodge, and also your shots that miss take less time to leave the screen, meaning that you can fire follow-up shots that much faster.

I was always a fan of vertical shooters of the Atari 2600, my favorites being Megamania, Phoenix, Threshold, and Tac-Scan, and Space Invaders. Galaxian is every bit as good as the best of these, and is still fun to play even now.

Playing Galaxian tonight, I found that my strategy was different from how I played the arcade original some 35 years ago. My old strategy was to try to shoot the enemies still in formation. They were easier to hit, since they didn’t swoop or shoot at you, and it seemed to me safer to eliminate them before they could turn into a threat. I’d try to shoot the divebombing aliens as they flew over me, and dodge out of the way of them and their shots, but mostly I concentrated on blowing away he ranks of Galaxians in formation, much as I approached Space Invaders.

My new strategy was much more successful, and rewarding: I ignored the galaxians in formation, since they don’t do anything that can hurt me, and focused on the divebombing aliens. It turns out, this has many advantages. First, by focusing on the divebombers, you are focusing on the only thing in the game that can threaten you. Shooting them is a much more reliable way to avoid them than dodging. You will need to dodge sometimes, but if you focus on developing skill in shooting the moving enemies, it gets pretty easy to pick them off before they can collide with you. The green Galaxians are simple, slow moving, and easy to hit. The purple ones are harder to hit, but with a little bit of practice the timing becomes easily mastered.

Hitting divebombing enemies in mid-flight makes you safer in two ways: enemies are destroyed before they’re low enough to collide with you, and they can’y get all their shots off. Typically, you’ll hit them as they cross ahead of you, and so you’ll be moving in the same direction, to track them, and the shots they do get off will fall harmlessly behind you, and by destroying the alien as it passes directly above you, you prevent it from getting ahead of you where it can drop bombs that would be dangerous to you.

Additionally, by hitting them as they’re diving toward you, your shot has less distance to travel, which means that you can get off more shots — since you can have only one shot on the screen at a time, when they hit something low on the screen, the shots don’t have as far to travel, meaning they hit the target sooner, meaning that your bullet is consumed and you can then fire another shot more quickly. If you miss one of the bombers, you might still end up hitting one of the galaxians still in formation, especially early in the stage, which isn’t so bad either. But the lower your shots are when they connect with an enemy, the faster you can shoot.

This in turn sets up a rapid flow of firing, hitting a dive bomber, then hitting the next dive bomber with a rapid follow-up shot. Once mastered, you can mow through the entire formation in quick succession in this manner. This turns out to be very enjoyable. You feel more skillful, since you’re targeting the fast-moving enemies, getting more points for them, and it looks more risky, since you’re often hitting the enemies pretty low on the screen, when it looks like they’re most dangerous — but at the same time you’re actually playing the least risky style of play. Of course, that’s what skill is — finding the right pattern of actions to minimize your risk, while doing what looks the most daring.

It’s clever, because the more intuitive way to avoid risk would be to try to avoid the dangerous enemies and attack the enemies that aren’t a threat. But counter-intuitively, when you focus on the dangerous enemies, and take the aggressive approach of destroying them rather than running from them, it minimizes the risk they pose to you, while the enemies that aren’t a threat remain a non-threat.

At this point, I recognized what a truly well-designed game Galaxian for the Atari 2600 is. I’m curious to see whether this strategy applies to arcade Galaxian. Since I don’t have ready access to an arcade with Galaxian in it, the next best thing is to watch a YouTube video of a skilled player.

And it looks like this is indeed the strategy to employ, although this player also has enough time to target plenty of enemies still in formation. I think the 2600 and arcade versions are different enough in their game play that they feel like different enough that while the basic strategies are more or less the same, the specifics are different. In the arcade, there’s much more space between the bottom of the screen, where you are, and the top of the screen, where the enemy formation is. But ultimately, I think the Atari port gives you less time to target the enemies in formation, forcing you to spend most of your time focusing on the swooping divebombing enemies.

In any case, Atari 2600 Galaxian is a fantastic game, and if you’re into vertical shooters is a must have, being one of the finest examples of the genre on the Atari, as well as an outstanding port of a historic and classic game.

GameMaker Studio 2 impressions: Object editor

The most notable change in the Object Editor is that sub-windows are “chained” to the main form, in what YoYoGames is calling “Chain view”.

GMS2 Object Editor

The idea is that different parts of the Object editor should all be visible, not overlap each other, connected visually.

The main Object window shows the object’s basic properties: the Name, Sprite, Collision mask, and Visible/Solid/Persistent/Physics properties, as you can see. Chained to it are the object’s Events, and the Code Editor (or DnD Editor) will be chained off of the Events sub-panel. If your object happens to be a Physics object, or has Parents or is a Parent, then the Parent and Physics sub-panels will also chain themselves to the main Object editor form.

GMS2 Object Editor chain

This takes some getting used to, and occupies quite a lot of space on screen, which for users with smaller displays can make it a problem to work with Objects inside of a Workspace.

Fortunately, Object Editor windows, like any other window, can be broken out of the main GMS2 window and maximized, to fill up the entire screen if desired. Users will either love or hate Workspaces and Chain View windows, and if you’re one of the ones who hates them, you’ll need to get used to breaking the editor out into its own window and maximizing it, as this seems to be your only recourse for now. There’s a few Preferences in the Text Editors section that will make this easier for you, should you want to configure them:

GMS2 Text Editor Preferences

The GameMaker Community Forums have been very active in discussing the UX issues created by the new UI, though, so don’t be surprised if YYG do make a few changes in future updates.

DnD or GML?

The Object Editor comes in two flavors: Drag-n-Drop (DnD) and Code Editor (GML). Which variant you get is currently determined when you create a new Project, but you can switch at any time. Most users will probably prefer to create GML projects and work in the code editor, but beginners, younger users, and non-programmers may prefer the DnD option.

Probably the most important feature of either variant is its interface for defining actions in your Object’s events.

I’ll be focusing mainly on the GML version, since that’s what advanced users will use. But briefly, Drag-n-Drop has been completely overhauled in GMS2.

The new Drag-n-Drop system

Vastly expanded in GMS2, there are now DnD equivalents to just about every function in GML. Unfortunately, this means that there are vastly more icons needed to represent all of these new DnD actions, making them harder to learn. Similar to Chinese or Japanese, where every written word has its own symbol, there’s a DnD icon for every GML function. While it’s reasonably easy to pick up a DnD library with a small number of actions, this quickly becomes unwieldy as the number of actions grows. Unfortunately I expect this will have the undesired effect of making DnD too complex to use for beginners and non-programmers, making it questionable how valuable the DnD system will be in the future. Learning to code by typing out instructions isn’t that hard, and is arguably the better way to learn in the first place. But it’s nevertheless true that for certain people, they feel intimidated by programming or typing, and an intermediary step of using DnD like “training wheels” until the new user has an understanding of GameMaker’s fundamentals and is ready to move on to GML, has been one of GameMaker’s defining features.

In GMS1.x and earlier, DnD Actions were iconographic representations of special GML functions that started with action_ for example, action_set_hspeed(number). These functions were mostly redundant, being equivalent to other GML functions and expressions, for example hspeed = number;

The action_ GML functions are obsolete in GMS2, and are no longer needed. DnD Actions can convert directly into GML with a single menu command. This is a one-way conversion, and should help users who want to “graduate” from DnD programming to GML programming. Formerly, in previous versions of GameMaker, there was no way to convert DnD to GML code, other than to manually re-write everything. If you try to convert GML into DnD, rather than a sequence of DnD actions, you’ll get your GML code wrapped up in an Execute Code DnD Action, and the Object Editor will switch to DnD mode, allowing you to continue programming with DnD actions. While not particularly useful for advanced GMS users who are already familiar with programming in GML, it’s a nice improvement to the way the DnD system works.

GML Code Editor

The new GML code editor is still somewhat rough, but shows promise of numerous improvements. Indenting is standardized, to 4 spaces per tab by default, although this is configurable, and there are subtle guidelines showing where tabs will align to in the background. Row lines are numbered, again configurable if you don’t want to see them.

GMS2 Code Editor

The most obvious difference is the new color coding for syntax. This may take a bit of getting used to, but at first I found that my code looked very rainbow-y, and I found this to be somewhat of a distraction at first, but after a few days I found that I had adjusted. Every color is customizable, if you want to bother with that.

Auto-completion and hinting is improved in the new editor. All project variables, macros, etc. are included, not just the built-in GML keywords.

GMS2 Code Editor AutoSuggest

The completion hints at the bottom of the Code Editor window are very helpful to remember all the arguments that must be provided to a function, in the right order. And for any scripts which you author, if you use JSDoc commenting, you can provide hints for your own functions as well.

GMS2 Code Editor Completion Hint

Rough Edges

Cursor navigation keys are either different from standard Windows text editors, or else not yet fully implemented. I’m accustomed to, and very reliant upon, using Home|End|Page Up|Page Down|Shift|Control|Arrows to move the cursor about the window, to select text, and for copy/pasting. In the GMS2 code editor, these keyboard shortcuts do not all work as expected, which can be pretty annoying.

In most text editors, Home and End keys will make the cursor jump to the 0th or last position in a row, or if Ctrl+Home|End is pressed, the 0th or last position in the file. Presently, Home and End do not appear to be supported at all in GMS2.

The Arrow keys move the cursor around the document one character at a time, and if Shift is held down, the characters that the cursor passes over are then selected. Holding Ctrl down will speed the cursor up, moving it a word or a paragraph at a time.

For some reason when selecting text using Ctrl+Shift+Arrow, with the horizontal arrows, the selection gets “stuck” at the beginning/end of a row, and will not advance beyond that unless Ctrl is briefly released. This is a relatively minor annoyance, but should nonetheless be corrected. Normally, Ctrl+Shift and the Left or Right Arrow key will select to the next word, and will wrap lines if it reaches the end of a line.

Up or Down Arrow will move the cursor up or down a row, and with Ctrl+Shift held down, should move up/down to the next blank line. This is standard behavior in pretty much every text editor I’ve used in Windows, or Mac OS for that matter, but it is not the behavior in GMS2 at the time of this writing. I am hopeful that this will be addressed before the end of the Beta.

But by far the biggest thing that users are complaining about in the Community Forums has been the way the IDE wastes space in its default configuration, due to the way Workspaces and the Chain View UI work. Fortunately, breaking out the Code Editor into its own, maximized window is an easy workaround to this problem, and largely addresses it to my satisfaction.

Apart from these issues, I like the new UI for the Object Editor, and the Code Editor very much.

GameMaker Studio 2 licensing is de facto subscription-based

Today I had a bit of a reminder, of something that has been gradually coalescing for some time. And since it got my attention, I thought it might be a good time to talk about some specific things, and some far-ranging points as well.

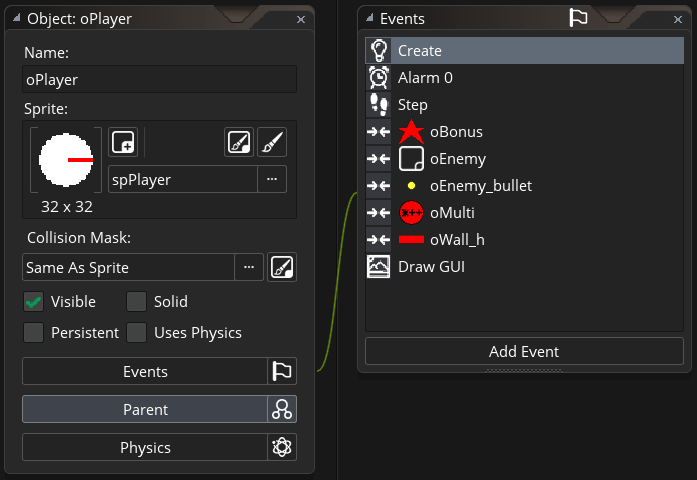
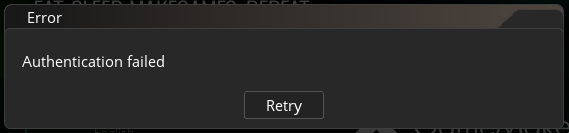
It started innocently enough… I launched GameMaker Studio 2 today, and got an error message:

GMS2: license expired

I clicked Retry, and was prompted to log in with my YoYo Account. I supplied my credentials, and…

GMS2 authentication failed

Something must be wrong with their authentication backend for the IDE, perhaps? My login credentials allow me access to the website, so I know that my credentials are good. I logged in there, and reviewed my license, and my license duration says “permanent” although at the moment apparently there’s something wrong and my license is “expired” according to the software.GMS2 permanent license

I eventually got in by doing a password reset. I’m still unclear why I was able to authenticate to the YYG website, but not GMS2, using the same known-good credentials, but resetting did the trick. I’m back in.

All’s well that ends well, right?

Implications

“OK, so what? What does that all mean, and why should I care?” you might ask.

What it means is this: Despite the label saying so, my product activation isn’t permanent. At the very least, it’s subject to YoYoGames continuing to exist, and having their licensing service up and running, and contingent on my software refreshing some authentication token periodically.

If that can’t happen any longer, for whatever reason, then I lose access to the software that I paid for. And that’s disturbing!

(To be fair, this had been the case under GMS1.x as well, all along, although previously in GMS1 license activation wasn’t explicitly tied to a user authentication. GMS1 users had to have a network connection in order to refresh their product license, which needed to happen about once a month.)

Moreover, although YYG have been quiet about it, all the groundwork is laid for them to switch to a subscription-based model, at a point when they decide the time is right. My guess is that probably this will happen a few years from now, once the consumer software market has accepted SaaS — if and when that happens. I believe it is more “when” than “if”, at this point. The average consumer doesn’t care or understand enough to make it a matter of “if” any longer.

We could quibble if we wanted, but what I’m getting at is that what YYG call a “permanent license” I will call a “permanent subscription.” The license is activated by virtue of the account authentication, and if this ever breaks or is revoked, the software is not usable.

The vendor controls the version numbers, so they can play the game that when they want to break the promise of permanent licensing, all they have to do is release “GMS3” which will be a new product, and thus not bound to the old licensing terms in the way that 2.1 or 2.9 or 2.x would have been. YYG have already done this — they amended the terms of the GM:S Master Collection license, which originally had a provision entitling users who purchased Master Collection to all new versions and modules that YYG released, without qualification; later this was changed to “within the 1.x sequence”. So Master Collection owners would have to pay for GMS2 when it came out.

That’s the thing with these license agreements; the vendor can change them at any time, and users have little choice but to go along with it. This is a major reason why I view click-through agreements as false contracts. In real contracts, one party cannot change the terms of the agreement on a whim, without the consent of the other party. In the world of click-through license agreements, this happens all the time, and users have little choice but to accept it, or stop using the product. Very often, users aren’t even aware of the terms, before or after the change. It’s almost meaningless to the user, because they have so little say, so little power, that there is little to no benefit to them in understanding the agreement that they supposedly are agreeing to.

So of course YoYo would amend a previously stupidly over-open agreement to close a loophole and provide necessary limitations. Of course, that’s just the way business is. Businesses need to make money, and if they don’t make money, they stop existing. Restaurants may offer free refills, but if you go back the next day they make you buy a drink again. But you have to be careful when promising things that are unlimited, permanent, or infinite. The reality is, nothing like that ever exists. Customers should know better than that. It doesn’t stop them from complaining when they discover that in reality there are limits, impermanence, and finities.

To be clear, I don’t mind paying for new versions when they are released, just as I don’t mind buying a new car when my current car is worn out and needs to be replaced. I fully recognize that paying the company for new products enables it to continue developing those products, and I want to support that. But I want to own the car that I own! I don’t want to have to buy a new car every single year, regardless of how much use I have gotten out of my car, or how well the car still works. I don’t want to lease or rent a car, or pay a taxi service to drive me about when I need to go somewhere. I don’t mind that these are all options — I simply believe that consumers should be able to choose freely what makes the most sense for them, the choice that provides them with the greatest value.

Subscription-based GameMaker: someday

Nevertheless, it seems very plain that at some point in the future, YYG intend to switch to a subscription model. This could be the day all casual game developers will be done with GameMaker. I expect that YYG are well aware of this, and will be very careful about how and when they do it. Just as it makes little sense to pay for a gym membership that one only uses a few times a year, it will be hard to justify subscribing to GMS as a software as a service if the service is not used often enough. YYG will want to retain those users.

Well, perhaps they’ve thought of that as well. In Help::About, there’s an interesting statistic that they display for you, counting how long you’ve been running the IDE:

GMS2 time in IDE

Potentially, then, this means that YYG are in a position to offer GMS2 on a metered basis, charging users not on a subscription basis, but on a consumption basis. This could feasibly make it affordable for casual users to pay for the software hourly, and if they use it enough, it could then cap the cost and cut over to a subscription for the whole year.

Let’s say YYG’s business target is to extract, for example, $100/customer/year on average from all users. Professionals will pay considerably more, in order to gain access to “pro” features that they need to do business, such as additional build targets, access to the Marketplace, etc. Pro users are their “bread and butter” so they focus on delivering products with features that will attract and keep the pro segment of the market happy.

These features are by and large attractive to non-professional users as well, and especially to students and other users who have aspirations at turning professional at some point. Cultivating future pro users is very important to the continued success and growth of the product. So YYG will do well to subsidize the student/apprentice developer with professional aspirations.

But a lot of game developers are not releasing games professionally. YYG know this very well. YYG know that casual game developers won’t go for paying an annual subscription that amounts to $100/year. That amount sounds like a lot of money to many people. Many of their users still complain about YYG raising the cost of GM8.x from $25 to $40, and then introducing GM:S at a $99 price point. A lot of GM:S users still only use the free version of the software, and likely will never willingly spend any amount of money on it. YYG know that some users may only use GameMaker for a few hours a year, perhaps amounting to a few days of total usage at the most.

And yet, if you amortize a cost of $100 over the course of a year, it’s just about $0.27/day. In the early 1980s, people would pay quarter just to play one arcade game for a few minutes. $0.27/day sounds much more reasonable than $100/year, even though it’s the same amount. YYG can tap in to the casual developer market as a revenue source by softening the psychological barrier to paying $100 all at once.

So, to bring them in as paying customers, YYG can provide a metered pay option, and if they decided to charge $100/year for the software as a subscription, and to create a perception of “value” for the $100 annual expense, maybe they charge $1/hour or $1/day or $10/month for metered users — something higher than the “bulk” rate of $100/year, but something still reasonable that a casual developer will (perhaps grudgingly at first) accept. At $1/hour, a heavy user would hit 100 hours quickly, and at that point they would be better off cutting over to the annual subscription model (and if YYG wants to keep customers happy, that cutover should happen seamlessly), but a casual user who maybe puts in a weekend game jam or two a year will come close to 100 hours of use in a year, and YYG can still extract close to their goal, by hitting them with the metered cost.

And maybe this is even good. The videogame marketplace is choked with free product produced by, it seems by now, millions of developers, very few of whom are able to make significant income at it. Maybe the barriers to enter that market are too low right now, resulting in glut and pain and low quality products. Maybe easiest to use tool with the largest number of users should be priced out of the reach of people who aren’t really serious and really talented, enough to be able to create truly viable games. Maybe there’s some silver lining to that.

I’m not against YoYo making money, and if this keeps their lights on so they can continue to develop the product, then good for them…

But…

In the pre-SaaS subscription days, software companies would generate the revenue they needed by scheduling a major release to occur (roughly) annually, and sell permanent licenses for that version. More or less users felt forced to upgrade annually in order to stay current, and the vendor would offer an upgrade discount to soften the blow, as well as provide new features, improved user experience, bug fixes and support as the incentive to buy into the annual upgrade.

The crucial difference was that software activation was permanent, and wasn’t dependent upon a service that needed to be up and working. This meant that users could opt not to upgrade, if they didn’t feel that what the vendor was offering was worth upgrading. Often, causal users would choose to remain a few versions behind, rather than pay for the upgrade. In some cases, this was due to not liking the direction the vendor was taking with the product, and very frequently it was due to the fact that software bloat meant that older hardware had a hard time running the latest version of a product, but could run an older version very fast.

The downside of course was that permanently activated licensed software was prone to piracy, and over the years the sales lost to product activation circumvention has been a vast, but literally uncountable figure. Software developers know this and network-managed licenses tied to accounts that are ultimately in the control of the vendor seems to be the final solution.

YoYo have not announced any plan to actually switch to a subscription model, but all the infrastructure is in place for them to switch to it at any time, and I expect that they will at some point. The writing is pretty much on the wall at this point. That day may not be in the near future, but it is probably inevitable that it will happen. Even if it doesn’t happen, users’ “permanent” licenses are anything but, so long as the user must authenticate to YYG’s product activation service on a regular basis, and may be subjected to termination if YYG deems they have violated ToS or EULA provisions. Or if YYG decide they want to stop supporting some old version of the product. Or if they go out of business, or get hacked, or whatever else.

To be clear, it’s not that I have a believe that YYG want to “screw” their customers; it’s that they have the power to do so, whether or not they ever actually exercise this power. No user wants this hanging over their head, and most tolerate it only because they’re unaware, and those who are aware tolerate it only so long as they aren’t bitten by it.

To be sure, it will never be the case that all GameMaker users will agree with every move that YYG will make with the product, and every time they do anything, there will be some users who will complain. Sometimes, some of them will have a valid point, that they are being screwed. Companies inevitably screw customers when it is not profitable to serve them.

My point is, historically it’s always been possible for disgruntled users to continue using the last version of the product that they were happy with. And for now, this continues to remain the case. Only, as of now, it only continues to remain the case for as long as YYG elect to allow it to.

Evolution of the status quo?

And, really, End User License Agreements and Terms of Service Agreements have always held such provisions, haven’t they? Users who do not agree with EULA/TOS are supposed to not use the software. Only, this was less enforceable before use of the software was tied to an account that you have to authenticate. This created both slack which allowed the users to get by even when they didn’t agree to every last term in an agreement, and tension when vendors could discern that agreements were not 100% adhered to, and felt that this was harmful to them.

That unresolved tension is in a slow process of snapping, and it’s the users who are bound to lose. I can say this with certainty, because software users are like any group of consumers, and consumers are averse to becoming organized an acting in solidarity, while businesses can only remain in business by being organized and being focused. Sure, on occasion people may raise their collective voices loud enough to be heard on issues like Network Neutrality and SOPA, but this is always a precarious, ad hoc affair, where the public’s interests are protected at the last minute, as though by a miracle. Companies can afford to play a long waiting game, and like a constrictor snake, squeeze a little bit further each time, never relaxing, until the prey is exhausted and expires. The bottom line is this: computers and software are becoming increasingly more like appliances, and less like tools. The only recourse users have is to stop using; if enough users do that, then they can kill a product. Of course, killing a product in no way creates a better, or more agreeable one. All user “victories” end up being pyrrhic in this sense. So in the end users are still screwed in a “take it or leave it” proposition. At a certain point, the only freedom attainable is to be your own programmer.

The alternative is for vendors and users to respect and support one another. To the extent that this happens, I guess we can say that software-based service companies will be successful. But really, I strongly suspect that users, much like medieval peasants, can tolerate a great deal of oppression and famine before they will revolt. So the existence of a market for software is not by itself sufficient proof of a free or happy market.

EULA/TOS agreements have for a long time now been treated as though they are contracts, even though the reality is that they fall short of being a true contract in numerous ways. Oftentimes, software usage agreements have provisions which are not legally enforceable, but including them is a “nice try” on the part of some lawyer who seeks to erode the public’s rights in some way that allows corporations to consolidate their power over the individual. Very often these “nice try” measures go unchallenged, and once they’ve been around for a while, there’s precedent for them, and suddenly they’re seen as “valid”. They go unchallenged, because users could ignore them without penalty, and pressing the matter in the courts was expensive and risky at best, not because they’re accepted. But by not challenging them, over time they become accepted and normalized.

I’ve never been happy about this state of affairs. Even as a kid, I could always smell something rotten about the idea that you could buy something and not actually own it, but only the limited right to use it under certain specific terms, which you could only agree to or not, with no provision of negotiation. It creates an unequal relationship where one side has nearly all the power, and the other side has very little, other than to boycott.

For this reason, I’ve always felt that licensing was a bogus business model, and that software should be owned outright by a customer who purchases it, with all rights that are implied by that statement. This belief comports much better with the values of the Free Software movement than it does with commercial software, and so for many years I’ve preferred to use Free software. For the most part, though, I’ve been a pragmatic believer in “best tool for the job” and if that meant the best software was commercial/licensed, then ok, but if it was Free/Libre software, then so much the better.

Wider ramifications

I see developments like this taking place in the world of commercial software, and in response I feel more strongly drawn to Libre software. But I don’t think that Libre software is necessarily the right use model for all software development, and I also don’t think that Libre software can protect all users freedoms.

For example, it’s difficult to see how a libre use model would work for entertainment software or art software. Where the point of the software is to provide a very author-controlled experience for the users to enjoy, certain software freedoms may not work. For example, the right to modify and redistribute modified software would mean, effectively, that companies could prey on indie developers who release an innovative game who assume all the risk of creating a novel experience, only to have it ripped off by a company who does very little innovation or risk taking, but positions themselves to exploit the creative work of others. Certainly, some user freedoms are important to preserve, such as the right to port an experience to other hardware, to create archival backup copies, and so forth, but I don’t necessarily feel that all user freedoms must be granted by a developer who is using software as an artistic medium, where the fact that the product is, contains, or uses software is incidental to the product being sold as an experience. It is fun, and allowable, and good, to enable users to create mods of games, but not a requirement or necessary in order for that software to be considered a work of merit. And playing a modded game is not the same experience of playing the original game.

And Libre software doesn’t protect all freedoms: we’ve all seen Libre software used in ways that abuse users rights. For example, much of the internet runs on a platform of Libre software, but provides a closed service to users which does not respect user freedom. I am only able to use Facebook, under Facebook’s terms; I can’t stand up my own Facebook service, which I might modify and redistribute. This despite Facebook being built on a stack of Libre software such as Linux, Apache, PHP, most of which are licensed under terms that say that users have the right to modify and distribute changes made to them, but that the source code must be distributed if the changes are distributed.

Web sites get around this by never distributing — “serving” the software is not “distributing”. You don’t install the source for Facebook on your computer and manage your own Facebook installation; Facebook is a service that you visit, on Facebook’s computer, and log in to it to use Facebook under Facebook’s terms. I’m not just picking on Facebook, they just happen to be the biggest website in the world right now. But pretty much every website ever has always worked this way: you can consume the service it provides, but you can’t own the software that provides the service, can’t install it on your own computer, can’t modify it to work the way you want/need it to, and are therefore subject to the terms under which it is offered by those who do own the service. And so, users are subject to these terms. And their data is collected, harvested, and used in ways that benefit the harvesters, not necessarily the users, and sometimes in ways which harm the users, or are counter to users’ interests.

The Libre software movement recognized a lot of end-user rights that are important, anticipated a lot of ways which those rights may be attacked, eroded, and compromised, but it failed to adequately safeguard all user rights against all possible attacks.

One could argue that by not doing so, it enabled the commercial internet to flourish into what is has become today. And while that’s true, that’s not an all-good proposition.

GameMaker data structures: a cautionary tale

When you work with data structures in GameMaker, you have to be very careful with references to a data structure that has been destroyed.

When you create a data structure in GMS, the ds_*_create() function returns an integer value which is the id of the data structure. You then use this id whenever working with that data structure.

When you destroy the data structure, this frees up the memory that the data structure used, and the data structure can no longer be accessed.

If you take that id that belonged to the destroyed data structure, and test to see if the data structure exists, using the ds_exists() function, it should return false.

The operative word being “should”. It might not.

Why not? Because, the GameMaker runtime reuses the ids of data structures, and if you create a new data structure, it will hand out that id that belonged to the data structure that was just destroyed.

To illustrate the example, we’ll use a ds_stack:

var a = ds_stack_create();
ds_stack_destroy(a);

var b = ds_stack_create();
show_message(string(ds_exists(a, ds_type_stack)));

You would think that ds_exists(a, ds_type_stack) would return false. But it doesn’t, because ds_stack b just reused ds_stack a‘s old id.

Apparently, the correct practice — which is not mentioned in the manual — is to immediately clear the value of a after destroying the ds_stack that it points to, like so:

ds_stack_destroy(a);
a = undefined;

If you do that, then a no longer points to an address that can potentially be assigned to new data structure, and so you’re safe, even if b has the same address as a once did.

Of course there’s still a problem if multiple variables all point to that same destroyed data structure. This is probably a somewhat rare circumstance, but could possibly by the case in some circumstances, for example if you have a global variable, or controller object, holding a data structure that is accessed by multiple instances of some common object. Keeping track of every variable that references the destroyed data structure and clearing all of them when the data structure is destroyed is not an easy thing to do.

Update: Thanks to @YellowAfterLife for the very clever tip!

In other words, do this:

//creation of stack:
a[0] = ds_stack_create();
//aliases to the stack
b = a[0]; //copy of stack id stored in a[0] -- don't do it this way!
c = a[@0]; //reference to stack id stored in a[0]

//destroy the data structure AND clear the variable
ds_stack_destroy(a[0]);
a = undefined; // this destroys the array a[], and therefore kills all references to the ds_stack.

//create a new stack, let's see what happens with our aliases
d[0] = ds_stack_create();

ds_exists(a[0], ds_type_stack); //returns false, because the array was destroyed.
ds_exists(b, ds_type_stack); //returns true, but misleadingly so, because when we created d[0], 
 //we re-used the same id that had been used by the stack referenced by a[0], 
 //and copied to b by value. 
ds_exists(c, ds_type_stack); //returns false, because c references a[0] rather than storing a copy of the id it had stored.
ds_exists(d[0], ds_type_stack); //returns true, because we created ds_stack d[0].

It’s debatable whether the re-use of handles like this is in fact a good practice, but at the moment it’s the way GameMaker works, and has worked, for years. But the discovery that they are re-used (and so soon after being destroyed) is a bit of a shocker.

More information.

The worst code I’ve ever written

Over at the GameMaker Community Forums, there’s an amusing thread where people confess to the worst code they’ve ever written. Since GameMaker is often used by newbies, it’s pretty common to see some hilarious WTF moments in code.

My favorite has been:

if fps < 60 { fps = 60; } //Fixes any performance problem!

If you’re not familiar with GameMaker, fps is a read-only variable that the engine updates to indicate the number of frames per second the engine is making. If it’s below room_speed (often 30 or 60), the game appears to stutter or lag. This happens when the hardware can’t keep up with the demands of the software…. so naturally the way to fix this to simply assert that fps is meeting target! ROFL!

I think that this code would actually compile and run without throwing errors in old GM. Despite being a read-only variable, GM would allow you to overwrite the value, not caring because the engine would simply re-calculate fps and update it again on the next step, and nothing adverse would happen. But if you were drawing fps to the screen, you would see “60” — even though the game might be lagging.

Here’s my own story:

When I was working on my game Alamogordo for Ludum Dare 29, I wanted to replicate the font used by the Atari 2600 in the game E.T. 
 
I had not heard of sprite fonts before, and had never used them. So I improvised my own system. First, I fired up E.T. in an emulator and took screen captures of the score, taking care to get all 10 digits that I would need. I then cut out the numbers and put them into a sprite resource. As I recall, I had problems with the selection size not always being the same, or being exactly centered, so it took quite a bit of time just to get the sprite set up so that it was the right size for all digits, and all the digits were positioned the same relative to the sprite origin.

Next, I wrote a script that took a number that I passed into it, converted that number into a string, then took each digit in the string and ran it through a switch statement, matching the value in the substring against a case that drew the right sub-image of my sprite that held the images of all the digits, and correctly offset them from one another, to draw the score on the screen. Only… no, I didn’t even do it like that! I actually used div to get the ones, tens, hundreds, and thousands digit, and then used that value as the subimage index to draw the sprite.

It worked beautifully, and at the time I thought it was brilliantly clever, but that there had to be a better way if only I had the time to RTFM.

I was using the variable name “finds” for storing the score because the player’s score goes up whenever they uncover something as they dig through the Alamogordo landfill, finding it, and you got a certain amount of points for each find you discovered.

///Create Event:
finds = 0;
image_index = 0;
image_speed = 0;

ones_digit = 0;
tens_digit = 0;
hundreds_digit = 0;
thousands_digit = 0;

///Draw Event:
ones_digit = finds mod 10;
tens_digit = finds div 10;
hundreds_digit = finds div 100;
thousands_digit = finds div 1000;

draw_sprite(sprite_index, ones_digit, x, y);
draw_sprite(sprite_index, tens_digit, x-sprite_width, y);
draw_sprite(sprite_index, hundreds_digit, x-(2*sprite_width), y);
draw_sprite(sprite_index, thousands_digit, x-(3*sprite_width), y);

At the time, my inspiration for the game was very last minute, I hadn’t even intended to produce a project that weekend, but the idea came to me Sunday and I ended up putting the game together in literally about 10 hours altogether. So I was just pleased that it worked on the first try. I had literally no time to experiment or read through the manual in the hopes that I would find a proper way to do it!

Lol! I recall writing that code, running it, seeing that it worked, and saying “Right, then! Good enough!” and moving on to the next thing I had to do. It’s fantastic sometimes what you can crank out when you’re only concerned with finishing on time, and don’t care about things like correctness or maintainability.

Truth be told, this is probably not my worst code I’ve ever written, but it might be the worst code that I’ve written that actually did what it was supposed to do.

Epilogue: I later learned about and used a sprite font in my Ludum Dare 36 game, Ancient Technologies. It was a much nicer way to draw the score to the screen!

GameMaker Asset: Rolling Average

In creating my last tutorial and demo, I needed to calculate the rolling average for the fps so I could measure performance differences between Instance Pooling and Create-Destroy.

It turned out that the functions for setting up a rolling average were pretty simple, yet were a pain to do well. So once I got them working, I decided to make them into an asset for GameMaker: Marketplace, so they’ll be easy to re-use in any project, with any series of numeric values, and so I can share them with the community.

Calculating a rolling average over a series of streaming values is now simplified by these new functions:

rolling_mean_create()
rolling_mean_destroy()
rolling_mean_add()
rolling_mean_read()
rolling_mean_size()
rolling_mean_resize()

Rolling Average on GameMaker Marketplace (free download)

Rolling Average on itch.io (free download) (free download)

Full documentation

GameMaker Tutorial: Instance Pooling for performance optimization

Instance pooling is a design pattern which can potentially help performance in games where you are creating and destroying a lot of instances.

If your program is spawning and destroying objects very frequently, calling the Create and Destroy Events many times per step, it’s potentially a lot of extra processing. Creating instances and destroying others constantly seems wasteful. Why destroy the instances that need to be destroyed when instead you can re-use them, and avoid having to call the Create event on a New instance every time you need one?

The Code

You can download my demo code here:

The GMS2 demo is an import of the 1.4 demo, cleaned up to remove the Compatibility scripts.

Looking at the project code, you will see that I have used inheritance to make the Control and Instance Pool test implementations as close to identical as possible. I have included telemetry code, which tracks the FPS of the game while it runs, so that performance is quantifiable. In the GMS1.4 version of the project, all of the telemetry code is neatly separated from the demo code into its own Execute Code action. This makes it easy to modify the project for your own use, and get rid of the telemetry code entirely if you don’t need to quantify runtime performance, and only want the code that actually implements the Instance Pool pattern.

How it works

The basic concept of the Instance Pool pattern is simple. The goal is to minimize the amount of times we create new instances of some object in large numbers during the game. A good candidate for objects to use Instance Pooling with would be bullets, bonuses, and enemies. Instance Pooling is particularly beneficial when the object in the pool is somewhat “heavy” — that is when the Create or Destroy events cause a lot of processing to happen.

The way we achieve this goal is by re-using already-existing instances of the object. This is done by deactivating the instance rather than destroying it. We add the id of all deactivated instances to our Pool. Then, when a new instance is needed, we first check the pool to see if an already-created but inactive instance exists, and if so, we remove it from the pool, activate it, and re-use it.

The most efficient way to create and manage our pool is with a stack. Stacks are elementary data structures in computer science. Imagine a stack of pancakes. The stack gets bigger as you add more pancakes to it. If someone orders a pancake, you take the top one off of the stack, and give it to them.

This is what’s known as Last In, First Out, or LIFO data access. This happens to be just what we need. The stack gives us an easy way to keep track of the id of all of our deactivated instances, and when we need to activate one, we just pop it off the top of the stack. This is very simple to do, and therefore very fast. In GameMaker, stacks are created by ds_stack functions. If you’ve never used them before, take a moment to read up on them. It will help you understand how the demo works.

The code at the heart of this is quite simple. It looks like this:

//First check the pool to see if it has any deactivated instances in it that we can use
 if ds_stack_empty(pool)
 {
 //If not, we need to create a new instance. No performance gain.
 instance_create(x,y,oInstancePoolBullet);
 }
 else
 {
 //If the pool has an instance we can use, take it out and activate it.
 var bullet = ds_stack_pop(pool);
 instance_activate_object(bullet);

 //Reset the state of the instance. 
 //**If** this is cheaper than a new instance, we gain performance.
 bullet.x = x;
 bullet.y = y;
 bullet.direction = direction + random_range(-20,20);
 bullet.alarm[0] = bullet.TTL;
 }

There’s only a little bit of other code that you need. You need to create the ds_stack, most likely this is best done in the Create Event, using ds_stack_create(). And when the pool is no longer needed, you need to destroy the ds_stack using ds_stack_destroy(), most likely in the Destroy Event.

Of course, we also need to push instances to the stack when they are no longer needed. To do that, we do this whenever we would ordinarily destroy the instance:

ds_stack_push(oInstancePoolPlayer.pool, id);
instance_deactivate_object(id);

So, don’t destroy instances that you want to pool; deactivate them instead. With our bullet demo, I do this by giving bullets a “time to live” and then setting an timer. When the alarm goes off, the instance’s id is added to the stack, and the instance is deactivated. Then it just waits for the game to need it. In a full game, you would need to look at other occasions where you need to deactivate the bullet, such as when it goes outside the room, off the screen, or when it hits an object.

That’s basically it. But you may need to think about some additional concerns, which I will cover in the Findings section of this tutorial.

Running The Demo

Open the project with GameMaker Studio, compile, and run.

The Demo consists of an Instance Pool demo and a Create-Destroy demo for comparison.

Press the Space bar to spawn bullets. Press Tab to switch from one demo to the other.

The FPS is displayed at the top-left of the screen. The first number is the minimum fps, the middle is the average fps over the last 30 steps, and the last number is the maximum fps. The minimum and maximum fps reset once per second. The average is a rolling average over the last second.

In the Instance Pool demo room, hold the space bar down until the first bullets to spawn reach the end of their life. At this point, the instance pool is filled, and no more instances will spawn; instead, deactivated instances will be re-used. At this point, you should notice the FPS dramatically shoots up and stays consistent.

Findings

To my surprise, I did not find that there was much benefit to creating an Instance Pool for bullets. Create and Destroy is about as fast as Instance Pooling with simple bullet objects in GameMaker. I expect the reason for this is that the GameMaker runtime engine is not particularly fast, but even when I did a YYC build, I still saw no real advantage to using an Instance Pool, at least in terms of fps.

Over a long game session, it may be that there is a reduction in memory fragmentation since we are updating values in RAM that has already been allocated, rather than rapidly allocating/de-allocating memory when we create new instances and destroy them constantly. But I haven’t tested that, so it’s merely speculation for now. Update: This benefit of reducing memory fragmentation is confirmed by Mike Dailly of YoYoGames.

In order to show a benefit to Instance Pooling, I had to weigh down the Create Event for my bullets. To do this, I ran a simple repeat loop to increment a variable. This is obviously inefficient and pretty pointless, but it serves the purpose of simulating a complicated object with an init script that takes some time to run. If that init script needs to be run only once, and not every time the instance is re-used, then there is a benefit and using the Instance Pool pattern will help.

When does it make sense to use the Instance Pool pattern? When there is a performance issue, and the Create or Destroy Events are more expensive than instance_activate_object() and instance_deactivate_object().

Setting up and managing the instance pool is pretty simple, but it does take some work, and incurs some overhead. It’s not worth it to incur this overhead unless there’s a tangible benefit in the form of noticeably improved performance.

Run the code profiler, and see where your code is spending the most time. If it’s heavy on Create and Destroy events, an instance pool might be just what the doctor ordered. Otherwise, you may want to look elsewhere for your low framerate fix.

Additional Considerations

As I mentioned, there are a few other considerations that you should think about when implementing an Instance Pool, which I will discuss here.

Should we Prime the pool?

In my demo, we only create new instances when there are none in the stack. This means that until we’ve deactivated our first instance, the stack is empty, and there is no performance gained by having it.

In fact, since we’re checking the stack before we create each new instance, there’s actually an infinitesimal hit to performance. When you run the Instance Pool room, we see pretty much the same fps performance as we did in the Create-Destroy room, until the first bullets start to be recycled. Only then do we see fps shoot up.

Well, what if we want the performance to be high from the very first bullet? We can do that, by priming the stack, by creating a bunch of bullets, and then immediately deactivating them and pop their id’s onto the stack.

We could create a special object that we might call oPoolPrimer, which lives for several steps, creates the instances we need and deactivates them, adds them to the Instance Pool stack, and then destroys itself when its work is done.

The best time to do this is when the performance hit won’t be noticed, such as when the game is in a menu screen. Alternately, we can create the instances gradually, over a longer time than would introduce a noticeable performance penalty.

To be effective, you will need to have a good way of calculating maximum the number of instances you need to have active in your game at any given time. Prime your pool with that many instances. That way, even when you have all of them active, you aren’t creating new ones, and your fps will stay high.

Trim the pool?

One of the downsides of the Instance Pool is that all those deactivated instances take up resources. Even though the CPU may not be spending as much time with those instances, they do incur some processing overhead to manage even when disabled, and as well they use some RAM.

Depending on your game, you might have a moment when you need a huge number of instances active, but in other parts of the game the action isn’t as intense, and you won’t need so many. For example, in my demo, I spawn 100 bullets per step, for 20 steps, resulting in some 2000 instances max if you hold the space bar down the entire time. But if you don’t need to shoot all the time, all those disabled bullets end up in the stack. Do you really need 2000 disabled instances? If there isn’t going to be as much shooting going on, you might not. We can free up resources by trimming the stack every so often.

One way to do this would be to set a recurring alarm so that every few seconds, the stack is trimmed if it goes over a certain size.

///Alarm0 Event:
while ds_stack_size(pool) > trim_limit
{
 //remove the top instance from the stack and destroy it
 with ds_stack_pop(pool) {instance_destroy();}
}
alarm[0] = reset;

This will keep the stack small when it doesn’t need to be so big.

Delete the pool?

If you delete the stack, you should realize that any disabled instances that we were tracking in the stack still exist. They will continue to do so until the game ends, or you change rooms. If you don’t change rooms right away for some reason, you may want to run through the stack before you destroy it, popping all the instances out of them so that they can be destroyed as well. Otherwise, those inactive instances will continue to take up resources.

while !ds_stack_empty(pool)
{
 //remove the top instance from the stack and destroy it
 with ds_stack_pop(pool) {instance_destroy();}
}
ds_stack_destroy(pool);


Benefits in network multiplayer games

This comes from GMC Forums user JuJu: There’s a nice implicit benefit of instance pooling: It makes handling multiplayer netcode for complicated scenes easier if you can refer to instances by a common index across all machines.

GMS2 Impressions: Tilesets and AutoTiling

One of the best new features in GameMaker Studio 2 is the improved tile system.

I never used tiles much in GMS1, because they were such a pain to work with, and did so little. In GMS1, tiles were a type of background resource. In the GMS1 room editor, you had to select your tiles manually, then place them one click at a time, which was very tedious. GMS users developed complicated auto-tiling scripts that would select the correct tile and place it in the room at runtime. This solution worked well, but was complicated to understand, set up, or modify. GMS1 tiles did not support animation, so if you wanted animated backgrounds, you either had to use sprites, or else come up with some sophisticated tile-swapping script that would programmatically animate your background tiles.

If you wanted your tiles to represent some kind of interactive object in the game, you had to also place an invisible object behind the tile, and program it to do whatever behaviors you needed. To me, there wasn’t much point in using tiles when I could just assign a sprite to the object, and use the object directly. If you did work with tiles in GMS1, then you may have to unlearn or relearn a few things before you feel comfortable with the new system.

I’m happy to say that in GMS2 the situation is much better. GMS2 tiles support animation and auto tiling. You can draw tiles in the room by the mouse without having to click each and every time you want to place a tile. This makes working with them much easier than it used to be.

However, there is still a lot of learning to do in order to develop the understanding necessary to set up tilesets and get the full use of them in your projects.

It took me an evening to figure out, about 4-6 hours, which isn’t bad. But after I had figured it out to the point where I have auto tile working, I realized that I could save others a lot of frustration by going a bit further to explain it.

Getting into GMS2 Tiles

First, the help manual articles on the Tileset Editor is essential reading. There are several articles which you should read first. And maybe a few YouTube videos are also helpful, to see the process of setting up a tileset for use within your project.

It’s actually pretty easy to use after you’ve gone through the process once so you understand it, but until you’ve completed your first working tileset, you’ll probably have a lot of questions and uncertainty about how it all works and what you’re supposed to do.

This article will guide you through that first time, and explain things so that they are easier to understand, and you’ll have an easier time of it than I did.

Before getting into that, there are a few constraints that you need to be aware of when working with tiles.

  1. The tile grid size must be a power of 2. So, for the most part, 8×8, 16×16, 32×32, or 64×64 tiles will be the sizes to work with.
  2. Any tile-based animations must have a number of frames that is a power of 2: 2, 4, 8, 16, etc.
  3. Tile positions in a room are constrained to a grid in GMS2. You can no longer position them at an arbitrary position in the room; they must snap to a grid the size of the tile.
  4. However, that entire grid may be offset, using the X Offset and Y Offset properties.
  5. Tiles are placed in layers, and you can use as many Tile Layers as you like in the Room Editor.

Now that we’ve covered that, let’s look at the Tileset setup and usage workflow.

GMS2 Tileset Workflow

First, let’s take a general overview of the entire workflow, before we dive deeper into each step:

Tileset setup

Before you can use a tileset to decorate a room, you have to set up a Tileset resource. A Tileset resource is a resource that depends on a Sprite resource, and defines how the image in the Sprite is sliced up to create a set of tiles.

  1. Create a sprite that will hold the image data for your tileset.
  2. Create a tileset asset.
  3. Define the tileset.
    1. Add the sprite from Step 1 to the tileset.
    2. Set tile size to split up the image into tiles.
    3. (Optional): Create any brushes, animations, and auto tile sets that are needed.
  4. Create additional tilesets, as needed.

Tileset usage:

This is where you put your tiles to work in the game. It’s all about creating and managing Tile Layers in your rooms, using the Room Editor.

  1. Add a tile layer to a room
  2. Select a tileset to use in the layer
  3. Add tiles to the tile layer.
  4. Add additional tile layers to the room, as needed.

Now that we’ve covered the workflow of Tile setup and usage at a high level, let’s go back and look at each step in depth.

Tileset Setup

Create a sprite that will hold the image data for your tileset

The first thing you need to do is create a Sprite resource, and add an image to it containing your tiles.

If you’re drawing this yourself, you’ll need to learn how to lay out this image. The first thing you’ll need to understand is that your tiles need to conform to a grid. You should set up the grid in the Image Editor to the size you’ll need for your tiles. I found that using an Image Editor grid that is half of what I want my actual tile size to be works well, so for a tile image that I wanted to draw that would have 32x32px tiles in it, I set the grid size in the Image Editor to 16×16. Then I drew out my tiles, using chunks that were 2×2 grid cells.

An important thing to realize in drawing your tiles is that your tile images should include some solid pixels as well as negative space surrounding the solid part of the tile. This is difficult to understand, especially at first, and it takes some getting used to the idea. To explain this properly, I need to illustrate.

tile_grid

As you can see here, I have drawn a brown rectangle, representing a solid object in the game room, and overlaid a green grid on top of it, showing how the tile borders should look if they’re done properly. Noticed that each tile (except for the center ones, which are completely solid) shows a certain amount of solid space and some white space.

I think a lot of people probably mistakenly think that their grid of tiles should look like this:

tile grid wrong

I know I did, at first. It’s hard to understand why tiles don’t work the second way — it seems a lot more obvious to position them that way, doesn’t it? After all, it takes fewer tiles, and there’s no overlapping into the negative space surrounding the solid object. If you’re just thinking about a simple rectangular platform or wall like this, it’s easy to think that it should simply be a 2×4 rectangle of solid brown tiles, all the same. The thing is, if you go back to the first illustration, you can see that in that illustration, we have many different types of tiles, representing edges, corners, and solid areas, working together to create the same rectangular platform, and since they’re not all the same tile, you can re-combine them in many different arrangements, to create other shapes.

Since the point of making the tile set is to enable you to create all the different types of edges and corners, you want to make sure that the sprite your tiles are drawn in is laid out in such a fashion.

We really need to create a ring so we can have inner and outer corners represented in our tile. We also need to have a tile representing a completely open space. By convention, GMS2 auto tile sets reserve the top left tile grid for this empty tile. Here’s a better image that shows all the different corner and edges that we’ll need for a complete tile set:

tile template

With this arrangement, we are able to create almost any arrangement of blocks, but we still have a few more tiles to create. We actually have a few duplicates in this tile set, which I’ll color code in the next illustration, as well as number the unique tiles.

tiles-14

As you can see, we have 14 unique tiles in this image, and a few duplicates. There are actually two more tiles that we’ll need to create a universal 16-tile auto tile set. They are:

tiles 15 and 16

We can consolidate space in our earlier image by eliminating some of the redundant tiles and replacing them with the ones we needed, like so:

tiles-16

Really, these tiles could be arranged in any ordering; this is just an example of one such arrangement.

There’s also a 47-tile auto tile but I think now that we’ve walked through the 16-tile auto tile set creation, you should be able to figure out the 47-tile version on your own. The ideas are the same, it’s just more work.

But just to make things convenient, here are two templates that I’ve created for 16×16 and 47×47 auto tiles, matching the order that the GMS2 Tile Set editor uses for its template:

16-tile tileset template for GMS2

16-tile tileset template for GMS2

47-tile tileset template for GMS2

47-tile tileset template for GMS2

You can right-click the images above, save, and use these for laying out your own tiles. No need to ask permission or give credit.

If you need 32×32 sized tiles, or larger, just scale the image up to whatever you need. Then import the image into the GMS2 Sprite Editor, set the grid to the size you need, and draw over the template in a new layer until you’ve built up your tiles!

I will point out here, that this sheet that we’ve created above just gives us a starting point to create a single auto-tile set. Most games will likely need several tilesets, for different areas of the game. Auto-tiling is best for your basic terrain, such as walls, floors, and platforms.

We could also choose to include numerous additional tiles in one sprite image if we desire, for decorative things that do not make sense to do auto-tiling with, or create additional tiles to represent terrain features in the game such tables and chairs, or other furniture, or trees, bushes, you name it. Or we could store each type of terrain, decorative elements, etc. in its own tileset resource.

We could also duplicate this 16-tile layout multiple times, and include in a variety of different terrain types, or different colors, all in a single large tilesheet. Or we could have multiple tile sheets. But be cautious about making the sheet too large. You’ll want to read the Texture Groups section of the manual to understand the limits of how large your sheets can be.

One last thing: If you wanted to create an animated auto-tiling tileset, you would need to create additional copies of our 16-tile auto tile layout, and draw each one as a different frame of animation. We’ll explain how to do this in the section on creating tile animations.

Create a tileset asset

Now that we have a sprite holding the image for our tile set, it’s time to create the tile set asset. To do this, right-click on the Tile Sets section of the resource tree, and select Create. You can name the new Tileset something meaningful, such as grassland, or ocean, or city, or indoors, or whatever suits your game.

Define the tileset

The Tileset editor looks like this:

GMS2 Tileset editorThe first thing to do is to add the sprite from Step 1 to the tileset. Click on Select Sprite, and select the sprite. Next, set tile size to split up the image, by entering the information in the Tile Properties fields at the right, as appropriate. The sprite image will appear sliced up by a grid as you change these values. At this point, we could use our newly created Tileset right away, by going to the Room editor, adding a Tile Layer, and drawing in some Tiles from our newly created Tileset.

(Optional): Create any brushes, animations, and auto tile sets that are needed

Once the grid looks how you want it, we’re ready to create any Brushes, Animations, and/or Auto Tiling sets that are needed. These are very useful, and powerful, new features that have been added to GMS2’s tiles. Not every Tileset needs Brushes, Animations, or Auto Tiling to be defined for it, but when you do use these, especially Auto Tiling, it will make creating your rooms much easier and faster.

This is where it really starts to get good.

Brushes

A brush is a selection of tiles, grouped together and added to your tile layer as one. Let’s say you have something in your tile that takes up more than one tile. This could be a large terrain feature, such as a building, or a mountain, or a tree. Without using brushes, every time you wanted to plant one of these multi-tile features in your room, you’d need to select each tile one at a time, place it in your Tile Layer, in the correct arrangement… this is tedious work and easy to screw up. So Tile Brushes make this easier by collecting the related tiles together, so that they can be added to the Tile Layer with just a single click to place the entire Brush.

You can use Brushes not just to place multi-tile graphics, but to place arrangements of platforms. Say you have a particular jumping puzzle that you want to repeat several times in a level; you can create a Brush with the tiles spaced out in just the way you want them, then place them quickly and easily into your Tile Layer.

Animation

Setting up Animation Tiles is pretty easy. Simply add a new Animation, specify the number of frames (which must be a power of 2), and then add the tiles that make up the animation one at a time until you’ve filled out the animation.

It’s worth noting that you don’t have to use Tilesets to do animation. You can place any sprite resource into a room directly, without the need to place an instance of some object to draw the sprite for you. These can be added to asset layers or background layers. Background layers can tile or stretch or both, and can move. So consider whether you need to do your animations in tiles or if you can do them more easily another way.

Auto Tile

Setting up an auto tile set is pretty easy too, although at first it seems complicated. Taking the sprite that we created, above, we have all the tiles we need to create a 16-tile auto tile set. GMS2 also supports a 47-tile system, but it is much the same to set up.

Create a new Auto Tile set. The auto tile set will present a template which you have to fill in with tiles from your tileset sprite. Simply go through the template by clicking on each tile in the template, then click on a tile from your tileset sprite to connect it to the template. The currently selected tile in the template is red, and as you go through your tileset adding tiles to the auto tile template, it will fill in the tile you selected, then advance to the next tile in the template automatically.

GMS2 auto tile editorThe key to understanding the auto tile template is that the light grey parts of the template are meant to represent the solid parts of your tile, and the dark grey parts are meant to represent the empty space. If you didn’t know this up front, it’s very difficult to read the template correctly, and this was one of the most confusing parts of figuring out the auto tile editor.

Each of auto tiles (remember, there can be more than one in a tileset resource) is called an auto tile library. The image above shows two auto tile libraries about to be created; a 16-tile library, and a 47-tile library, just to show what they both look like.

It’s also important to understand the buttons to the right of the auto tile templates, which look a bit like a yinyang. These control how the tileset treats the borders of the room. Outside the edges of the room, the tileset must make an assumption: either the tiles outside the room count as empty, or as filled. This influences the auto tile system to select the appropriate tile at the room edge, and will result in an edge border around the room if the outside is treated as empty.

Once you’re done setting up the Tile Set resource, when you go to the Room Editor, in the Tile Layer editor, you’ll see a section in your tile palette called Libraries. Here, you can select Brushes, Animations, and Auto Tile sets to draw, rather than selecting individual Tiles from your Tile Set.

Pro Tip: An auto tile library will not work until and unless every tile in the template has been assigned. If you try laying out auto tiles in a tile layer and they just won’t draw, no matter what you do, go back and look at the template. Somewhere in there, some part of the template has not been assigned to a valid tile in your tileset.

The auto-tiling section in the manual illustrates this pretty well, with some nice animations showing how it works.

Animated Auto Tile sets

To create an animated Auto Tile set, simply make sure that each tile in your Auto Tile set is the first tile in an Animation set. In the room editor, the tiles will not animate, but as long as you place animated tiles in the editor using the first image in the animation, they will animate at runtime.

Re-Auto Tiling (Auto Tiling at runtime)

What if your room changes once the game starts? For example, if you have destructible terrain, and a piece of a platform gets destroyed, will the tiles automatically adjust accordingly? Unfortunately, no. Not yet; Dynamically re-auto-tiling at runtime is not supported by GMS2 at present, but it is a planned feature according to YYG lead programmer Mike Dailly, albeit with no release date announced yet.

This means that, at least for now, your auto-tiled setup will not automatically update the tiles if something changes during the game, for example if a new platform is created, or an existing one is destroyed, the tiles in the adjacent region will not update. This can cause things to look weird.

Presently the only way to handle this would be through a custom coded solution to evaluate the neighbors and determine an updated arrangement of tiles. This is pretty much the old system from GMS1, when auto-tiling was done at runtime.

There are scripts published on the GMC Forums and available for purchase in the Marketplace that will do auto-tiling for you, and YouTube videos describing how they work. These will need to be updated in order to be compatible with GMS2. At this time I haven’t evaluated these solutions, so I won’t be making a recommendation for any here. Hopefully YYG will provide a built-in solution in the form of GML functions, and there won’t be a need to invest time into developing custom solutions.

Create additional tilesets, as needed.

Your project can have as many tilesets as needed. Create as many as you like, to allow you to create as many different environments as you need for your game. It’s probably best to start simple and just create one at first, and then once you’re happy with it and satisfied that you know how to use the tile system, create additional Tilesets.

You can use multiple Tilesets in the same room, and in different layers, overlapping them. This is how you can develop very nice looking rooms.

Can a tile layer move/scroll?

Short answer: Yes. The functions tilemap_x() and tilemap_y() allow you to move a tile layer around the room. For complete details of all the things you can do with tilemaps, consult the manual.

The individual tiles in the tile layer have to align to their grid. So you can’t offset individual tiles, and make them move. But you can move the entire tilemap. If need be, you could put a few tiles in a layer that moves, and use this to create moving terrain features. For things like crumbling tiles, or tiles that break loose and drop one at a time when the player stands on them, it’s better to handle these with objects rather than tiles; of course, you can just use a sprite that looks the same as the tileset that you’re using, so everything blends together.

Tile Collisions

GMS2 can handle collisions between instances and tiles directly, without the need to use instances of hidden collision object behind the tiles. This is very handy, since you no longer need to lay out a bunch of instances in a room, then tile over them, and as well it offers greater performance, because there’s much less overhead involved with tiles than there is with instances.

Tile Collisions are meant for solid, stationary objects, such as platforms in a side-scrolling game, or walls in a top-down game, not for handling all possible collisions in your game. You will still want to use normal collision events for handling collisions between different objects in the game.

I mention them here so you’re aware of it, but rather than make this article even longer, I recommend you watch the tutorial video by GMWolf, which explains one approach for how to make a tilemap collision system in GMS2. His approach is to create a separate, invisible tile layer for the collision tilemap, which separates collisions from the decorative tile layer, which allows you to have decorative tiles which have rough edge texture, for surfaces like tall grass or uneven rock. The collision checking is performed by the objects in your game, which check to see if their sprite’s collision mask overlaps the tiles in the collision map.

It’s a very good approach, but it is just one way to do it. In GMWolf’s demo, a player object is prevented from entering into the region covered by the collision map. But there may be other types of collision checking, for example to determine if the player has entered a region that does damage, or is overlapping a ladder tile. Each of these situations can be handled by some variation of this basic approach, using additional collision tilemaps for different types of collisions. For example, you could have a collision tilemap for solid platforms, another collision tilemap for ladders (which triggers your character’s climbing behavior), one for water (which triggers water physics), one for slippery platforms, one for danger zones, etc., as many as needed. You can even use a collision tilemap to trigger events, such as to spawn or activate enemies when the player reaches a certain region of the game. There are many possibilities, so use your imagination.

Isometric and Hexagon tiling?

Because of GMS2’s requirement that tiles align to grid, you can’t lay out isometric or hexagonal tiles in a single tile layer. You’ll need to use a two layer approach, with the second layer offset horizontally and vertically, so that the two layers blend together.

This approach has its downsides. Having to switch back and forth between the two layers when laying them out in the room editor is a pain. And checking both layers for collisions doubles the amount of work the game needs to do at runtime for handling tile-based collisions.

I hope that something is done about these problems, I would like to see an “isometric grid” checkbox in the layer editor that allows aligning to a half-sized grid, or perhaps a new tile layer type for isometric tiles. But for now a two layer solution seems to be the best approach.

Update: YYG lead developer Mike Dailly recommends that we refer to the Isometric demo in GMS1.x for their recommended approach to do isometric games, and adapt that for GMS2 as necessary. (Hopefully a GMS2 Isometric demo will be happening eventually).

GML move functions and Tiles

If you use the GML functions

move_bounce_all() move_bounce_solid()

move_contact_all() move_contact_solid()

move_outside_all() move_outside_solid()

these work with the collision mask of objects, not tiles. So they will not be helpful to you if you’re implementing a tile-based collision system.

However, you can write your own version of these functions to work with tiles; to do so you just need to understand how the built-in functions work, and how to detect collisions with tiles.

The function move_bounce simply reverses the hspeed and vspeed of the bouncing object:

So, first determine whether the tile collision is horizontal or vertical, then use:

hspeed *= -1;
vspeed *= -1;

to reverse the appropriate speed variable.

If the bbox_left or bbox_right is in collision, set hspeed *= -1. If the bbox_top or bbox_bottom is in collision, set vspeed *= -1.

The move_bounce functions also take a boolean argument to turn on “advanced” collisions, which use the collision mask to do precise checking. These are slower to calculate, and the manual recommends not to use advanced unless it’s necessary, but they otherwise work the same. If you wanted to, you could come up with a tile collision check that uses the sprite’s collision mask to check for collisions with tiles, and use that.

The move_contact and move_outside functions work by using a while loop to check for collisions with the calling object, moving it one pixel at a time until the while condition is satisfied. This is easy enough to implement in a tile-based system as well.

Further Reading/Videos

GameMaker Studio 2 impressions: importing from GMS1.4

YoYoGames announced a game jam to celebrate the GMS2 Beta a couple weeks ago, and I’ve decided to try to participate. I don’t have a lot of time to work on my project, but I wanted to do something to warm up for Ludum Dare 37 anyway, so this was just the excuse I needed.

Since I’m short on time, and am very interested to see how well the GMS1.4->2.0 import feature is, I decided to work on an update to my LD35 entry, Shape Struggle.

Import and Compatibility Report

First, I made a copy of my source code. Then I imported it into GMS2, which was easy. A few seconds later, the project had been converted.

Immediately, GMS2 presented me with a Compatibility Report which details all the conversions it had to make, and the report itself appears as a file in my project resource tree under Notes.

Mostly, the conversion report details involves replacing calls to obsolete functions with compatibility scripts that do the equivalent thing. In my case, the game converted nicely, and I was able to build and run it without any problems. But, I expect that if the conversion process ran into problems, perhaps a function call that it could not convert to GMS2, the Compatibility Report would make mention of this, and I might have some additional work to do before the project would run.

YYG’s documentation says that the compatibility scripts should NOT be messed with, they are not intended to be human editable, so I haven’t tried messing around with them, but it leaves me curious about what might happen if I did. Not being able to go into these functions and make changes makes me question how maintainable an imported project is; and if it is not very maintainable, it mostly defeats the purpose of importing and converting an old project.

I haven’t done enough yet to know whether this is a legitimate concern or not, but it’s a worry for now until I know more. It seems to me that in order to have complete control over your project code, you’ll eventually need to go through and re-write any code that makes calls to compatibility scripts, to do the equivalent thing in a manner which is completely native to the way GMS2 wants things done. In many cases, this could be a simple and straightforward transliteration of the old code into new code which eliminates deprecated functions. Depending on the project size, though, this could get very tedious.

Update: Reading the Help documentation more carefully, I misread. Only compatibility scripts starting with a double underscore should be left alone. From looking at the compatibility scripts that I have reviewed so far, it seems like a fairly straightforward wrapping — the old, deprecated function call is used to create a script of the same name, and the script calls the equivalent GMS2 GML function(s) needed to achieve the equivalent results. It should (in principle) be possible to replace the call to the compatibilty script with the code inside of the compatibility script, and thereby convert the project to pure GML2. This does not apply to __compatibility scripts, however. If your project converts with these, it may be necessary to rewrite your project a different way to make it pure GML2. Or you may be able to leave it alone and hope that you don’t need to maintain that part of the project.

Collision Mask problems

Although my project would build and run, the conversion process was not 100% perfect. I noticed that some objects seemed to be colliding in a way that indicated that there was a problem with their collision masks. Sure enough, when I went into the Sprite Editor to have a look, I found that the collision masks were all wrong.

Upon further investigation, I determined that the only type of collision mask that currently works in GMS2 is a rectangle mask. Diamond, Ellipse, Precise, and Precise Per Frame masks are available options, but when I use them none of them work — collisions do not register and no event happens.

Moreover, I found that the collision mask editor does not seem to draw the mask shapes very well. When I tried to draw an ellipse mask, the right and bottom edges of the ellipse were flattened. I spent a lot of time trying to re-draw them to fix this problem, but the editor just overrides what I try to draw, and there’s no way to override it.

What’s more, if I tried to adjust the Alpha Tolerance on the mask, it would reset the mask to fill the entire sprite.

Very likely these are bugs due to the software still being in Beta status, and will not be long-term issues with the import process once GMS2 is officially released from Beta. So, clearly, the Sprite Editor has some issues and a long way to go before it is ready for release, including features which apparently have yet to be implemented.

Image Editor WTFs (Woes To Fix)

I also had a lot of problems with getting used to the new Image Editor. Most of this is a matter of UI polish, but there’s so much that is familiar, yet different, in the Image Editor UI that it’s giving me a lot of frustration. I fully understand the need for a user interface to change over time, but I do not understand many of the changes that have been made with the Image Editor. It’s tough to even know how to formulate my questions about them.

I find that Select and Copy operations don’t behave like I’d expect them to — copy creates a new Brush in m brushes palette. I can’t simply paste the pixels I’ve selected, and expect them to appear in the image at the position where I copied them from. This makes aligning static elements appearing in different frames in an animation a huge pain. Unless I’m missing something. Yes, there’s onion skinning, which is a great feature to have, but I don’t want to have to do painstaking image placement, I want to simply paste and see the content draw in where it was in the frame where I copied it from.

There’s also no replace color tool in the new Image Editor. In the GMS1.x Image Editor, there used to be a handy tool that would replace all pixels in the image matching the color you clicked on with the color set in the tool. For example, you could turn all red pixels green, with a single click. This was a useful tool, and I miss it.

I find the Text Tool in the Image Editor to be in need of a great deal of additional refinement. Currently, it is not very usable. I need to be able to reposition the text after I’ve typed it, but before committing. Most modern graphics editors allow this, but in GMS2’s Image Editor, once you click, there doesn’t appear to be any way to move the text that you’ve started typing, which makes positioning it correctly largely a matter of guesswork. There’s also no font preview, so when you select from the list of font names, unless you’re already familiar with the font in question, you won’t know what it looks like until you start using it. Currently it’s a huge pain to use the Text Toolf.

Summing up

Still, overall I’m very pleased that the code conversion process resulted in a project that could compile and run without throwing errors. There are still issues that need to be resolved, namely problems with sprite collision masks not coming through correctly in the conversion. And a lingering question about how maintainable an imported project is, if we cannot touch the compatibility scripts. I expect in time, with some more experience with converting projects, it will become apparent what the best approach to take is with modifying a game after importing it from 1.4.

Fun enum ideas for game development

Most video games have a counting, ranking, or level system of some sort. It’s often good to have a thematic flavor to your counting systems. This way, rather than calling your level progression by boring old regular numbers, you can give each level number a meaningful, or flavorful, name. This can add character or meaning to your game world, or it can be used to help disguise the underlying math, resulting in a game where the underlying mechanics are masked away from the player, leading to a more mysterious experience where they need to experiment and discover. What’s cooler: a “level 3 sword?” Or “the sword of autumn?” What’s more powerful: the knight sword or the rook sword?

To that end, I thought I’d demonstrate a few example enums that you can use to spice up your game design.

ENUMerate all the things!

Alphabet {A, B, C, D, E, F, G, H, I, J, K, L, M, N, O, P, Q, R, S, T, U, V, W, X, Y, Z}

Greek Alphabet {Alpha, Beta, Gamma, Delta, Epsilon, Zeta, Eta, Theta, Iota, Kappa, Iota, Kappa, Lambda, Mu, Nu, Xi, Omicron, Pi, Rho, Sigma, Tau, Upsilon, Phi, Chi, Psi, Omega}

Military Phonetic Alphabet {Alpha, Beta, Charlie, Delta, Echo, Foxtrot, Golf, Hotel, India, Juliett, Kilo, Lima, Mike, November, Oscar, Papa, Quebec, Romeo, Sierra, Tango, Uniform, Victor, Whiskey, Xray, Yankee, Zulu}

Army (simplified) {Private, Specialist, Corporal, Sergeant, Officer, Lieutenant, Captain, Major, Colonel, General}

Navy (simplified) {Seaman, Petty Officer, Ensign, Lieutenant, Commander, Captain, Admiral}

Chess {Pawn, Knight, Bishop, Rook, Queen, King}

Rainbow {Red, Orange, Yellow, Green, Blue, Indigo, Violet}

Elements {Earth, Air, Fire, Water}

CardRank {Two, Three, Four, Five, Six, Seven, Eight, Nine, Ten, Jack, Queen, King, Ace, Joker}

CardSuit {Clubs, Diamonds, Hearts, Spades}

Zodiac {Aquarius, Pisces, Aries, Taurus, Gemini, Cancer, Leo, Virgo, Libra, Scorpio, Sagittarius, Capricorn}

Seasons {Spring, Summer, Autumn, Winter}

Months {January, February, March, April, May, June, July, August, September, October, November, December}

Weekdays {Sunday, Monday, Tuesday, Wednesday, Thursday, Friday, Saturday}

Lunar Cycle {New, WaxingCrescent, FirstQuarter, WaxingGibbous, Full, WaningGibbous, ThirdQuarter, WaningCresent}

Some of these may not necessarily have a natural order to them, but might just be a set of categories which you could use to organize something in your game. That something could be worlds, or items, or creature types, or powers, or anything else you can think of.

What else?

What else is there? Probably a whole lot! You could probably make a good basis for a game system out of gemstones, or metals, or barnyard animals, or anything, really!

If you know of a set of things that would make a good enum that I’ve left out, leave a comment below.

Using enums in GameMaker Studio

Enums are covered in the manual in the article on Data Types.

The basic syntax is as follows:

First, you have to declare the enum.

enum <variable>{<constant> [= <value>]}

You create the enum using the enum keyword, naming the enum <variable>. Then, in brackets, you list all the constants that make up the values in the enum. You can explicitly declare values for the enum constants, or you can leave them implied, in which case GameMaker will assign them integer values starting at 0, and increasing in order through the collection. You can even use expressions rather than a static value.

To access the enum constants, you use the syntax enum_variable.constant.

In your code, there are all kinds of situations where using an enum is potentially useful. Here’s a few things to look for in your code that might signal a good opportunity to use an enum:

Conditionals for checking state

Consider the following ways of checking the state of some object:

//check state using string matching
if state == "state_idle" {//do state actions}
//check state using literal numbers
if state == 0 {//do idle actions}
//check state using variable
state_idle = 0;
[...]
if state == state_idle {//do state0 actions}
//check state using enums
if state == enum.value {//do state actions}

Out of these, using enums is the best approach. Why are enums better?

Conditional checking by string matching is much slower than number matching. Your string value provides semantic meaning to the reader, making the code easier to understand when a human reads it. But when the program goes to check the conditional, it has to check every letter in both strings to see if they match.

As well, this approach is fairly error prone. It’s very easy to type the strings in slightly wrong. If you’re not careful, it’s easy to type one string where the state is assigned, and another string value where you’re checking state in order to do something state-specific. If you don’t catch the error, you’ll have a hard to diagnose bug because the conditional check won’t match what you’ve set the state variable to. One extra space, or misspelled word, or inconsistent use of capital letters, and the string match check will fail. The compiler won’t help you catch this sort of bug.

It’s a lot faster to do conditional checking via numbers. But naming your states with literal numbers: 0, 1, 2, etc. provides no meaning. Is 0 the idle state? is 1 running? is 2 jumping? Keeping track of this stuff in your head makes your work as a programmer harder, and makes the code hard to read, and brittle. You can do slightly better by creating a named variable and assigning the number value to it. The named variable can be expressive, e.g. state_idle = 0, state_running = 1, etc. But variables values can change, and storing each value takes a little bit of memory. By contrast, an enum value is constant — it cannot be changed once it is declared. And enums are global, so they are only declared and set in memory once, and thus require fewer resources. Even if you have ten thousand instances that use your enum, the memory used by them is the same as if there is only once instance.

Create an enum that provides expressive labels on these values, and you have the best of both worlds: expressive code that checks conditions fast, and uses computer resources efficiently.

Iteration over a set

Conventionally, programmers often rely on conventional looping variable names such as i or j to iterate over a collection of things, such as the members of an array, or other data structure. While this is OK, you can make your code more expressive by using enums to denote important numbers.

For example, it’s common for programmers to use a nested for loop iterating over the variables i and j to create a grid structure. Instead of using i and j, we can use variables named row and column instead. As we iterate over the range of rows and columns, we can use enums as flags to do something special at row (or column) == enum.constant.

Another example:

Say we want to implement an inventory equipping system for the player. The character has inventory slots for head, body, gloves, right hand, left hand, shoes. We decide to create an array, called inventory[], and assign the equipped item in each slot.

We could simply index the array with numbers:

inventory[0] = hat;
inventory[1] = armored_breastplate;
inventory[2] = iron_gauntlets;
inventory[3] = sword;
inventory[4] = empty;
inventory[5] = double_jump_boots;

Now, it’s not too hard to tell what each inventory slot is for. But it’s not as easy as it could be, either. Is the sword in the left hand or the right hand?

Let’s use an enum, and make the code easier understand.

enum inv_slots{head, body, gloves, right_hand, left_hand, shoes};

inventory[inv_slots.head] = hat;
inventory[inv_slots.body] = armored_breastplate;
inventory[inv_slots.gloves] = iron_gauntlets;
inventory[inv_slots.right_hand] = sword;
inventory[inv_slots.left_hand] = empty;
inventory[inv_slots.shoes] = double_jump_boots;

Now, it’s quite easy to see that the double_jump_boots are being worn on the player’s feet, rather than being carried in the player’s hands. It’s simple to keep track of which slot is which.

Creating a set of related, named values

Here’s a useful enum for direction angles for a top-down game:

enum compass {e = 0, ne = 45, n = 90, nw = 135, w = 180, sw = 225, s = 270, se = 315};

It’s much easier to remember and understand direction = compass.sw instead of direction = 225. You can use this enum for 4-direction and 8-direction movement or aiming, and you could even expand upon it if you wanted by adding constants for ene, nne, nnw, wnw, wsw, ssw, sse, and ese, like so:

enum compass {
 e = 0, 
 ene = 22.5, 
 ne = 45, 
 nne = 67.5, 
 n = 90, 
 nnw = 112.5
 nw = 135, 
 wnw = 157.5
 w = 180, 
 wsw = 202.5
 sw = 225, 
 ssw = 252.5
 s = 270, 
 sse = 292.5
 se = 315,
 ese = 337.5
 };

(I like to format my code like this; lining up the variable names, equals signs, and values makes it easy to scan down the file, and makes it clear that these values are all related.)

If I wanted, I could go a step further and use radians to make it clearer that these values are fractions of a circle:

enum compass {
 e = 0, 
 ene = radtodeg(pi * 0.125), 
 ne = radtodeg(pi * 0.25),
 nne = radtodeg(pi * 0.375), 
 n = radtodeg(pi * 0.5), 
 nnw = radtodeg(pi * 0.625),
 nw = radtodeg(pi * 0.75),
 wnw = radtodeg(pi * 0.875),
 w = radtodeg(pi), 
 wsw = radtodeg(pi * 1.125),
 sw = radtodeg(pi * 1.25),
 ssw = radtodeg(pi * 1.375),
 s = radtodeg(pi * 1.5),
 sse = radtodeg(pi * 1.625,
 se = radtodeg(pi * 1.75),
 ese = radtodeg(pi * 1.875)
 };

You can group together, and name other values that go together in a system using enums in this way, too.

Parting thoughts

Hopefully, these examples will help you see how enums can be useful to make your code more expressive, easier to read, and easier to maintain. Look for opportunities to use them in your code. They can really help!