Category: programming

Debugging TARJECTORIES: a Ludum Dare 38 postmortem epilogue

If you haven’t played TARJECTORIES yet, I encourage you to download and give it a try first.

Next, I encourage you to read the project postmortem article I wrote about the experience I had creating TARJECTORIES over a 48 hour period.

Back? OK.

In the wee hours of Sunday morning, in the midst of my debugging hell hours, I posted this on Facebook:

Debugging a program sometimes is like converting one system of thinking into an equivalent system of thinking, only one that works where the other one fails.

Since you can do this only one keystroke at a time, it’s pretty rough when you’re looking at transitional code and are looking for signposts to remind you of where you are. It’s common when you get distracted briefly to come back to looking at your code, desperate for these signposts.

This can end up making you very confused and waste a lot of time.

How to avoid this?

To put it in more familiar terms, pretend you’re writing a novel, and you want to change some of your characters around, so you need to update the text so that everything Smith says is now said by Roberts. Halfway into this, you’ve forgotten who’s who anymore, and there’s nothing in the manuscript that can help you tell what’s been changed already and what still needs to be changed.

If you keep versions of files, you can run a diff of the current manuscript against the most recently checked in version. If you check in versions at the right time, when things are self-consistent, not in a transitional state, this can be very useful.

If you don’t have, or don’t make use of, these tools, you’re putting a massive cognitive burden on yourself that prevents you from higher order thinking about the problem you’re trying to solve. If you get distracted in the midst of your transitional revision work, it’s like a juggler dropping their balls. One hiccup in the routine and the entire thing falls apart, and the only thing left to do is try to pick it all back up and start over.

The hardest thing is when you keep having ideas and thoughts about what else you’re going to need to do next. Often times a change will have a cascade of changes. Not necessarily code changes, but feature changes, or new features. Each one of these is like someone throwing another ball at the juggler. Even the best juggler can only handle so many things before they slip up and have to drop it. And while a person is juggling, there’s very little else they can do.

If you want to get real work done, don’t be a juggler. They spend most of their time repeating a cycle of familiar tasks that just maintain a status quo, and hardly have time to make any progress with anything else. It looks impressive, but it’s monumentally wasteful.

Learning not to juggle is even harder than learning to juggle, though.

The thing is, when you’re doing game development, design and development are tightly interwoven. It’s not even iterative, it’s sub-iterative. You’re figuring out what’s possible, what’s fun, what you can make work, and figuring out how to make it work, making it, and then seeing what else it needs — all at the same time. It’s inevitable that you will have ideas at every step in that process. And each idea is a ball to juggle. I found it works best to leave myself “TODO” comments throughout the code whenever I have an idea come to me while I’m still in the middle of working on something else, and keeping a notepad handy for things that I observe at runtime. Otherwise, you need to be able to split your conscience like a fractal if you want to have any hope of being able to do all the things that occur to you while you’re in the middle of development.

Holy s—. I’ve been at it since 10pm, and I think I finally just fixed a bug that I’ve been puzzled by for several hours. I can’t even begin to explain all the stupid details that I’d need to in order to convey what I just did.

But here goes anyway.

In my project, I have a planet which has a player on it. I had this working just fine with a single planet.

I wanted to create mutli-planet levels, but when I added a second planet to the game all kinds of things started going wrong because of all these hidden assumptions my code was making about there always only ever being one planet.

So I started disentangling the planet, which was really doing a lot of extra stuff that it didn’t really have any business doing. This stuff was managing other game state, and when you had multiple planets, they ended up screwing with each other as they both were updating the game state. Sort of like a race condition, I guess.

It caused some REALLY bizarre bugs, though.

The level counter went up smoothly until it hit 11, and then it started repeating itself a few times, then skipping a head several numbers, like 1, 2, 3, 4, 5, 6, 7, 8, 9, 11, 11, 11, 14, 16.

It also had a strange tendency sometimes to not spawn any player at all, on the second level 11.

I fiiiinally got the problem solved, without realizing that was what I was doing. I just started to give up and work on other problems, when I decided that the planet object should not create its own player. I’d done that early on because it made sense when there is only one planet. With two planets, each would create its own player instance, and then I’d have to go back after and delete one of them at random. This SEEMED to work, but somehow became responsible for the weird level number glitch, and the missing player object on the second level 11.

I STILL don’t get how that exactly worked. It still doesn’t make any sense to me. But when I decided to de-couple the player-spawning duties from the planet object, and instead of two planets each creating a player on it, and then randomly selecting one of those two to delete, I re-did the code to spawn two planets, then randomly choose one of the planets to spawn a single player on.

That fixed it. Like, whoa.

Update: A day later, it finally occured to me what happened, and why. This may not interest many, but for posterity, here’s what was going on:

When I made the game, I started out with a 1-planet room. I had this working so well that I didn’t want to screw it up, so when I was ready to start work on a 2-planet room, I created a new room so I could mess around in it. I had my level counter set up in such a way that after level 8, it would switch rooms to the 2-planet room for planet 9.

I had some code in the LevelUp object that handles this. But the thing about the Level Up object is, it doesn’t do those things when the game room loads. So on the transition into the 2-planet room, there were certain things that weren’t happening. To compensate, I (this was a bad move on my part) copied some code out of the LevelUp object and put it into the Creation code for the 2-planet room, and then failed to maintain this code adequately as I continued to make further changes on the LevelUp object.

So what happened was, when Level 8 is cleared, the LevelUp object does its end-of-level thing, and increments the global level variable, and creates new planets for the next level. It then checks to see if the level is 9, and since it is, it moves to the 2-planet room. The 2-planet room starts, and there’s 2 planets there from the room editor, not from the LevelUp object resetting the level. So nothing weird happens until after Level 9 is cleared, because that’s the first time the LevelUp object levels up in a 2-planet room.

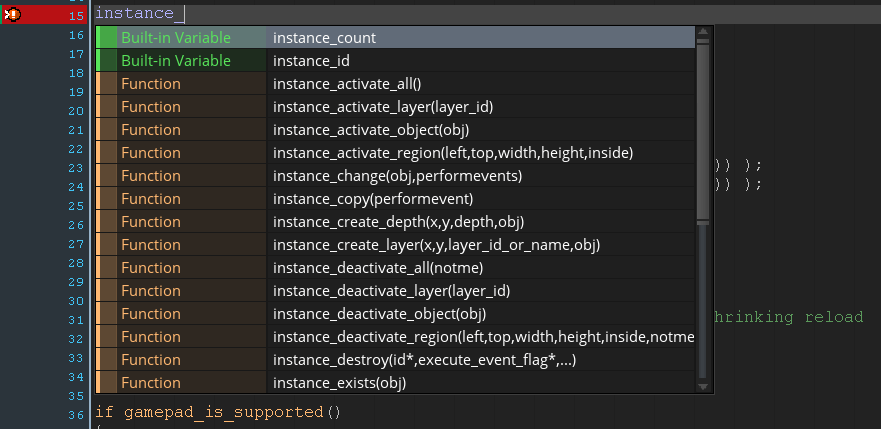
I’m still unclear why the level incrementer goes from 9 to 11 — it seems obvious that it has something to do with there being two planets, but I didn’t have the level incrementer tied in any way to the number of planets. And it’s more mysterious to me still that it gets stuck on level 11, and so displays level 9, 11, 11, 11, 14. If GameMaker Studio had a better debugger, I might have bothered to trace through the script and watch the variables change to understand what’s going on, but I figured out enough to fix the problem without completely understanding it (well let’s hope so).

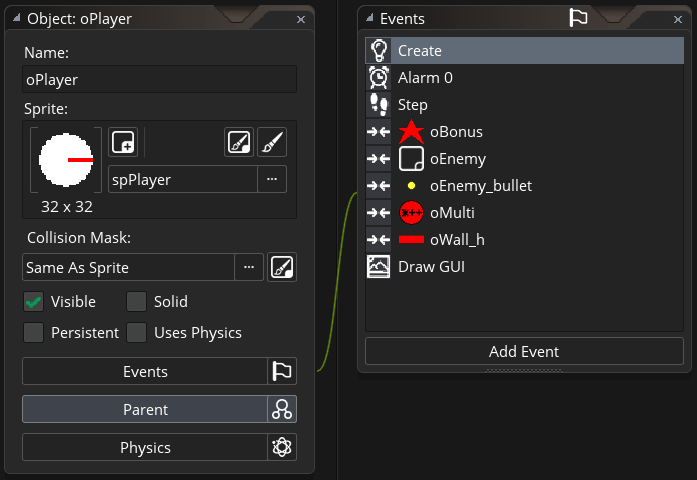
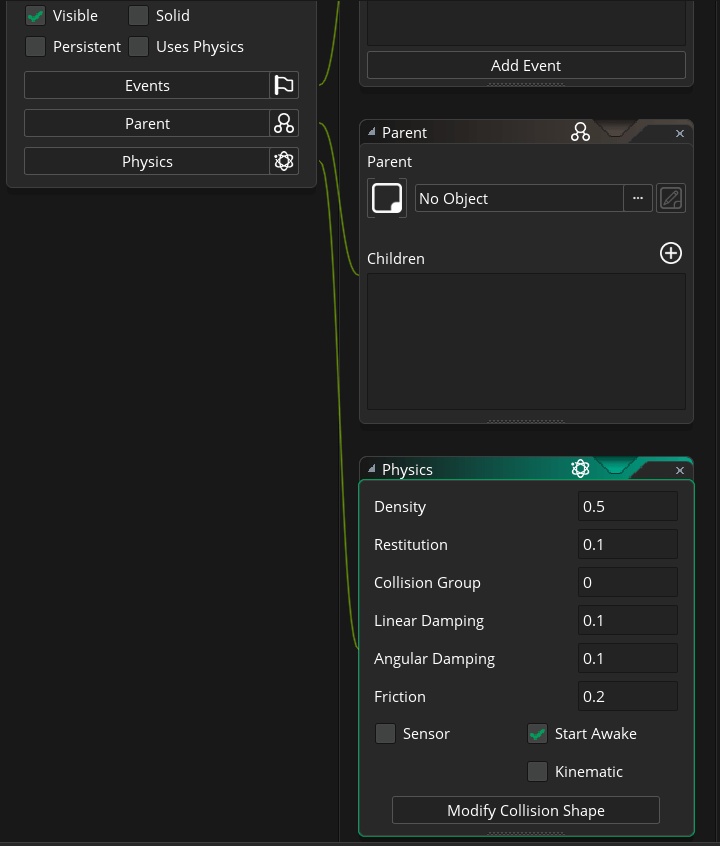
As to why there was no player at all on level 12, I do understand that. The planet’s Create event creates a player instance, and stores its ID in an instance variable, so it can update the player’s x,y position as the planet rotates. In the two-planet world, of course, I ended up with a player instance on each world. I didn’t need or want both of them, so I figured I’d just randomly destroy one of them, rather than fix it so that there would only be one. So I used a for loop and iterated over an array that should have been as long as the number of planets (2), and picked 1 array index to keep, and destroy all others. I figured I might want to make a 3-planet room at some point, and was trying to make the code work for N-planet rooms, rather than solve the 2-planet problem and leave a 3+ planet problem still unresolved. But sometimes the random chooser picked an array index that was out of bounds for the “keeper”, and so the for loop would go through and destroy all of the player instances. This happened to happen on level 12. It happened consistently on level 12 because the RNG seed value was always the same, and the same number of calls to random() always happen between the start of the game and getting to level 12.

I fixed the code by removing the player create from the Planet object, and put it after the planets are created, using choose() to select which planet if there’s more than 1.

The code works and appears to be bug free, but from a design standpoint it’s still messy. When I get around to doing it over, I will clean things up by removing the 2-planet room, which was only ever supposed to be an experimental room, and re-writing the code so that rather than move to that room when the level incrementer hits 9, it will spawn two planets, instead. This will enable move to remove the duplicate code by getting rid of the now-obsolete experiment room entirely. In retrospect that’s what I should have done in the first place, but because I was so concerned about not screwing up my working 1-planet room, I didn’t want to risk it. But really, all I needed to do was check-in to source control and create a fork to experiment in.

As easy and fast as the progress I made Friday night was, Saturday night was an absolute nightmare of a debugging session, just to figure this thing out and get it working. It’s SO weird how it was sortof almost working. Sometimes it’s a lot better to have something completely not working and obviously wrong. Those kind of bugs are much easier to fix.

The good news, though, is that I kept my Friday momentum through Saturday until I took my long break. I implemented a lot of features and had the game 95% complete, or so I thought. Just that last little bit of debugging took about 7 hours, and now the game is basically done.

So I made excellent progress Friday, and most of Saturday, although I unwittingly introduced this nasty puzzling bug during that progress, which stalled me for the entire night. But I still got so much done so quickly that I’m basically done now.

I have until 9pm Sunday to work on it, but I think it’s pretty good right now.

A tale of two GML scripts: code optimization through iterative development

Today I wanted to share two versions of a function that I wrote, in order to show how my iterative approach to software development works when I am doing code optimization to improve performance.

This example comes from my iMprOVE_WRAP asset. It’s a function that returns the shortest distance (taking into account the wrap capabilities of the calling object) between the calling instance and a target object.

The first implementation works, in that it correctly does what it’s supposed to do, but I never released it, because I wasn’t satisfied that it was good enough code to ship.

///iw_distance_to_object(target_obj, x1, y1, x2, y2, do_wrap_h, do_wrap_v,)

///@description Returns the distance_to_object from an improve_wrap object calling this function to another instance. 
///Compares all relevant points for the iw_object and returns the nearest distance, taking the wrap range into account.
///@param target_obj id of the target object to determine the distance to.
///@param x1 left x boundary of wrap range
///@param y1 top y boundary of wrap range
///@param x2 right x boundary of wrap range
///@param y2 bottom y boundary of wrap range
///@param do_wrap_h set whether the horizontal wrap is on (true) or off (false)
///@param do_wrap_v set whether the vertical wrap is on (true) or off (false)


//get the distance from the nine virtual positions
//return the shortest distance
var obj = argument[0];
var iw_distance, iw_distance_up, iw_distance_down, iw_distance_left, iw_distance_right, 
    iw_distance_up_left, iw_distance_up_right, iw_distance_down_left, iw_distance_down_right;
var tempx, tempy, shortest;
var x1, y1, x2, y2, range_width, range_height, do_wrap_h, do_wrap_v;

//keep track of original location of target object
tempx = x;
tempy = y;

//set up wrap range
x1 = min(argument[1], argument[3]);
y1 = min(argument[2], argument[4]);
x2 = max(argument[1], argument[3]);
y2 = max(argument[2], argument[4]);
range_width = x2 - x1;
range_height = y2 - y1;

do_wrap_h = argument[5];
do_wrap_v = argument[6];

//check distances
//check center
iw_distance = distance_to_object(obj);

if do_wrap_h && do_wrap_v //wrap vertical and horizontal
{
  //check corners
  x = tempx - range_width;
  y = tempx - range_height;
  iw_distance_up_left = distance_to_object(obj);
 
  y = tempx + range_height;
  iw_distance_down_left = distance_to_object(obj);
 
  x = tempx + range_width;
  iw_distance_down_right = distance_to_object(obj);
 
  y = tempy - range_height;
  iw_distance_up_right = distance_to_object(obj);

  //check left and right
  y = tempy;
  x = tempx - range_width;
  iw_distance_left = distance_to_object(obj);
  x = tempx + range_width;
  iw_distance_right = distance_to_object(obj);

  //check up and down
  x = tempx;
  y = tempy - range_height;
  iw_distance_up = distance_to_object(obj);
  y = tempy + range_height;
  iw_distance_down = distance_to_object(obj);
 
  shortest = min(iw_distance, iw_distance_up, iw_distance_down, iw_distance_left, iw_distance_right, 
                iw_distance_up_left, iw_distance_up_right, iw_distance_down_left, iw_distance_down_right);
}
if do_wrap_h && !do_wrap_v //do_wrap_h
{
  //check left and right
  x = tempx - range_width;
  iw_distance_left = distance_to_object(obj);
  x = tempx + range_width;
  iw_distance_right = distance_to_object(obj);

  shortest = min(iw_distance, iw_distance_left, iw_distance_right);
}

if do_wrap_v && !do_wrap_h //do_wrap_v
{
  //check up and down
  y = tempy - range_height;
  iw_distance_up = distance_to_object(obj);
  y = tempy + range_height;
  iw_distance_down = distance_to_object(obj);

  shortest = min(iw_distance, iw_distance_up, iw_distance_down);
}
if !do_wrap_h && !do_wrap_v
{
  shortest = iw_distance;
}

//return calling instance to original location
x = tempx;
y = tempy;

return shortest;

Let’s take a moment to appreciate this function as it’s written. It’s well-structured, documented, and expressive. First we declare a bunch of variables, then we do stuff with the variables, then we get our answer and return it. And this gives a correct result…

So what’s wrong with the above? It’s an inefficient approach, which checks each virtual position of the wrapping object. If the calling instance wraps vertically and horizontally, it has to temporarily move the calling instance 9 times and check the distance from each of 9 virtual positions, then return it back to its original position, only to return the shortest of those 9 virtual positions.

There’s also a lot of code duplication.

Still, it’s not horrible code. But it’s up to 9x slower than the distance_to_object() function it’s based on, if you’re wrapping in both directions, which will probably be common. I didn’t think that was good enough.

Rather than check each virtual location to see which is the shortest distance, we just need to know whether the horizontal and vertical distances are more than half of the width and height of the wrap region. If they are, then it’s shorter to go around the wrap. To know this, you simply take the x and y values of the two positions, subtract one from the other, and compare to the size of the wrap range. Once you know which virtual position is the closest one, you can temporarily place the calling instance there, and use distance_to_object() to get that distance. Put the calling instance back where it was, and then return the distance.

I realized as well that depending on whether the calling object wraps in both directions, you may not need to check for a wrap shortcut in the horizontal or vertical. So we can potentially avoid doing some or all of the checks depending on whether the do_wrap_h and do_wrap_v arguments are true or false. As well, this means we can avoid declaring certain variables if they’re not needed, which conserves both execution time as well as RAM.

I usually create local script variables in a var declaration, and assign the arguments to them so the code will be more readable, but I wanted to avoid doing that so that this function could be as lean and fast as possible. This might be an unnecessary optimization, but that’s hard to predict since I have no way of knowing ahead of time how this function might be used in a future project. In a project with many wrapping instances, it could very well be called many times per step, and every optimization could be critical. Since the script is intended to be included as a function in an extension, once I have it working properly it shouldn’t be opened for future maintenance, so making the script readable is not as important. So I opted to remove the local variable declarations as much as possible and just use the argument[] variables directly.

Also, to ensure that the wrap range is defined properly, in the non-optimized version of this function, I declare x1, y1, x2, y2 and assign their values using min() and max() so that (x1, y1) is always the top left corner, and (x2, y2) is always the bottom right corner of the wrap range. Technically for this function, we don’t care precisely where the wrap range is, only what the width and height of the wrap range are. That being the case, I can further optimize what I have here, and rather than use min and max, I can just take the absolute value of the difference of these two values.

It turns out that the process I went through to optimize this function is pretty interesting, if you care about optimizing. So I’ll go into greater detail at the end of this article about the approach I took to get there. But for now, let’s skip ahead and look at the finished, optimized function. Here it is, re-implemented, this time doing only the minimum amount of work needed:

///iw_distance_to_object(obj, x1, y1, x2, y2, do_wrap_h, do_wrap_v)

///@description iw_distance_to_object returns the shortest distance in room pixels between two objects in the wrap range, 
///taking into account the horizontal and/or vertical wrap properites of the calling object.
///@param obj the id of the target object
///@param x1 left x boundary of wrap range
///@param y1 top y boundary of wrap range
///@param x2 right x boundary of wrap range
///@param y2 bottom y boundary of wrap range
///@param do_wrap_h set whether the horizontal wrap is on (true) or off (false)
///@param do_wrap_v set whether the vertical wrap is on (true) or off (false)


if !(argument[5] || argument[6]) //not wrapping actually
{
 return distance_to_object(argument[0]);
}
else
{
 //We're going to figure out which virtual position is the nearest to measure from
 //To do that, we have to compare the h-distance and v-distance of the calling instance and the target position
 //If this distance is <half the range size, then the original position of the calling instance is closest
 //Otherwise we have to use one of the virtual positions
 //Then we're going to temporarily put the calling instance in that location, get the distance, and put it back 
 
 //arguments
 var tempx = x, tempy = y;
 
 if argument[5] //do_wrap_h
 {
   var range_width = abs(argument[3] - argument[1]);
   if abs(x - argument[0].x) > (range_width * 0.5)
   {
     x -= sign(x - argument[0].x) * range_width; 
   }
 }
 
 if argument[6] //do_wrap_v
 {
   var range_height = abs(argument[4] - argument[2]);
   if abs(y - argument[0].y) > (range_height * 0.5)
   {
     y -= sign(y - argument[0].y) * range_height;
   }
 }
 
 var d = distance_to_object(argument[0]);
 
 //return calling instance to where it was
 x = tempx;
 y = tempy;
 
 return d;
}

We don’t need to measure all nine distances to know which is the shortest; we can tell by comparing the direct distance to the size of the wrap zone — if it’s less than half as big as the wrap zone, the direct distance is the shortest. If not, then we need to wrap. We can check the x and y axes separately, and if both are called for then we can just combine them.

The second function should be much faster to execute, and uses less RAM. How much faster? Well, let’s do a test project using my Simple Performance Test and compare.

Download the iMprOVE_WRAP distance_to_object test project

It turns out that the improved code runs about 50% faster than the old code! That’s a measurable and worthwhile improvement. Although, that said, the old function ran well enough that I could have released it, and likely it would not have been a problem for many uses, particularly in Windows YYC builds.

Appendix: Optimization through Iteration

(more…)

iMprOVE_WRAP 2.2 released

iMprOVE_WRAP 2.2 has been released.

I’ve added two new GML functions to the asset: iw_point_distance() and iw_point_direction(). These functions work much like the built-in GML functions point_distance() and point_direction(), except they take into account the iMprOVE_WRAP wrap region.

Release Notes

Version Notes
2.2 New functions:

  • iw_point_distance(): returns the shortest distance between two points, taking into account the wrap zone.
  • iw_point_direction(): returns the direction of the shortest distance between two points, taking into account the wrap zone.

Get iMprOVE_WRAP

GameMaker Marketplace

itch.io

Full Documentation

iMprOVE_WRAP 2.1 released

iMprOVE_WRAP 2.1 has been released. Get it at GameMaker Marketplace or itch.io.

Full Documentation.

Release Notes:

1.0 Initial release
1.0.1 Updated iw_draw_self_wrap() to use image_blend rather than c_white for the color argument.
2.0.0 Added new functions:

  • iw_draw_sprite_wrap(): an iMprOVE_WRAP version of draw_sprite()
  • iw_draw_sprite_ext_wrap(): an iMprOVE_WRAP version of draw_sprite_ext()

Improvements:

  • Boundary drawing now occurs at wrap corners as well.
  • Phantom collison checking also occurs at wrap corners.
  • iw_collision_wrap() and iw_collision_wrap_map() functions now incorporate do_wrap_h and do_wrap_v arguments, and only perform collision checks where they are needed. They still return a value for all locations, but where no check is needed, they return noone.
2.0.1 Improvements:

  • iMprOVE_WRAP demo resources have been placed in folders to keep them tidy when importing the asset into a project.
  • oIMprOVE_WRAP_demo sprite has been updated to allow for more precise positioning. Sprite is semi-transparent, with a yellow pixel at the origin
  • oIMprOVE_WRAP_demo object now draws guide lines indicating the height and width of the wrap range. This is useful in confirming that clone drawings and wrapping is occuring where it should.
  • iMprOVE_WRAP demo dashboard text has been updated to be a bit more clear
2.1 New functions:

  • iw_distance_to_object(): returns the shortest distance to the target object from the wrapping object, taking into account all directions available.
  • iw_distance_to_point(): returns the shortest distance to the target point from the wrapping object, taking into account all directions available.

New demo room for the iw_distance_to_object() and iw_distance_to_point() functions


GameMaker Studio 2 impressions: Object editor

The most notable change in the Object Editor is that sub-windows are “chained” to the main form, in what YoYoGames is calling “Chain view”.

GMS2 Object Editor

The idea is that different parts of the Object editor should all be visible, not overlap each other, connected visually.

The main Object window shows the object’s basic properties: the Name, Sprite, Collision mask, and Visible/Solid/Persistent/Physics properties, as you can see. Chained to it are the object’s Events, and the Code Editor (or DnD Editor) will be chained off of the Events sub-panel. If your object happens to be a Physics object, or has Parents or is a Parent, then the Parent and Physics sub-panels will also chain themselves to the main Object editor form.

GMS2 Object Editor chain

This takes some getting used to, and occupies quite a lot of space on screen, which for users with smaller displays can make it a problem to work with Objects inside of a Workspace.

Fortunately, Object Editor windows, like any other window, can be broken out of the main GMS2 window and maximized, to fill up the entire screen if desired. Users will either love or hate Workspaces and Chain View windows, and if you’re one of the ones who hates them, you’ll need to get used to breaking the editor out into its own window and maximizing it, as this seems to be your only recourse for now. There’s a few Preferences in the Text Editors section that will make this easier for you, should you want to configure them:

GMS2 Text Editor Preferences

The GameMaker Community Forums have been very active in discussing the UX issues created by the new UI, though, so don’t be surprised if YYG do make a few changes in future updates.

DnD or GML?

The Object Editor comes in two flavors: Drag-n-Drop (DnD) and Code Editor (GML). Which variant you get is currently determined when you create a new Project, but you can switch at any time. Most users will probably prefer to create GML projects and work in the code editor, but beginners, younger users, and non-programmers may prefer the DnD option.

Probably the most important feature of either variant is its interface for defining actions in your Object’s events.

I’ll be focusing mainly on the GML version, since that’s what advanced users will use. But briefly, Drag-n-Drop has been completely overhauled in GMS2.

The new Drag-n-Drop system

Vastly expanded in GMS2, there are now DnD equivalents to just about every function in GML. Unfortunately, this means that there are vastly more icons needed to represent all of these new DnD actions, making them harder to learn. Similar to Chinese or Japanese, where every written word has its own symbol, there’s a DnD icon for every GML function. While it’s reasonably easy to pick up a DnD library with a small number of actions, this quickly becomes unwieldy as the number of actions grows. Unfortunately I expect this will have the undesired effect of making DnD too complex to use for beginners and non-programmers, making it questionable how valuable the DnD system will be in the future. Learning to code by typing out instructions isn’t that hard, and is arguably the better way to learn in the first place. But it’s nevertheless true that for certain people, they feel intimidated by programming or typing, and an intermediary step of using DnD like “training wheels” until the new user has an understanding of GameMaker’s fundamentals and is ready to move on to GML, has been one of GameMaker’s defining features.

In GMS1.x and earlier, DnD Actions were iconographic representations of special GML functions that started with action_ for example, action_set_hspeed(number). These functions were mostly redundant, being equivalent to other GML functions and expressions, for example hspeed = number;

The action_ GML functions are obsolete in GMS2, and are no longer needed. DnD Actions can convert directly into GML with a single menu command. This is a one-way conversion, and should help users who want to “graduate” from DnD programming to GML programming. Formerly, in previous versions of GameMaker, there was no way to convert DnD to GML code, other than to manually re-write everything. If you try to convert GML into DnD, rather than a sequence of DnD actions, you’ll get your GML code wrapped up in an Execute Code DnD Action, and the Object Editor will switch to DnD mode, allowing you to continue programming with DnD actions. While not particularly useful for advanced GMS users who are already familiar with programming in GML, it’s a nice improvement to the way the DnD system works.

GML Code Editor

The new GML code editor is still somewhat rough, but shows promise of numerous improvements. Indenting is standardized, to 4 spaces per tab by default, although this is configurable, and there are subtle guidelines showing where tabs will align to in the background. Row lines are numbered, again configurable if you don’t want to see them.

GMS2 Code Editor

The most obvious difference is the new color coding for syntax. This may take a bit of getting used to, but at first I found that my code looked very rainbow-y, and I found this to be somewhat of a distraction at first, but after a few days I found that I had adjusted. Every color is customizable, if you want to bother with that.

Auto-completion and hinting is improved in the new editor. All project variables, macros, etc. are included, not just the built-in GML keywords.

GMS2 Code Editor AutoSuggest

The completion hints at the bottom of the Code Editor window are very helpful to remember all the arguments that must be provided to a function, in the right order. And for any scripts which you author, if you use JSDoc commenting, you can provide hints for your own functions as well.

GMS2 Code Editor Completion Hint

Rough Edges

Cursor navigation keys are either different from standard Windows text editors, or else not yet fully implemented. I’m accustomed to, and very reliant upon, using Home|End|Page Up|Page Down|Shift|Control|Arrows to move the cursor about the window, to select text, and for copy/pasting. In the GMS2 code editor, these keyboard shortcuts do not all work as expected, which can be pretty annoying.

In most text editors, Home and End keys will make the cursor jump to the 0th or last position in a row, or if Ctrl+Home|End is pressed, the 0th or last position in the file. Presently, Home and End do not appear to be supported at all in GMS2.

The Arrow keys move the cursor around the document one character at a time, and if Shift is held down, the characters that the cursor passes over are then selected. Holding Ctrl down will speed the cursor up, moving it a word or a paragraph at a time.

For some reason when selecting text using Ctrl+Shift+Arrow, with the horizontal arrows, the selection gets “stuck” at the beginning/end of a row, and will not advance beyond that unless Ctrl is briefly released. This is a relatively minor annoyance, but should nonetheless be corrected. Normally, Ctrl+Shift and the Left or Right Arrow key will select to the next word, and will wrap lines if it reaches the end of a line.

Up or Down Arrow will move the cursor up or down a row, and with Ctrl+Shift held down, should move up/down to the next blank line. This is standard behavior in pretty much every text editor I’ve used in Windows, or Mac OS for that matter, but it is not the behavior in GMS2 at the time of this writing. I am hopeful that this will be addressed before the end of the Beta.

But by far the biggest thing that users are complaining about in the Community Forums has been the way the IDE wastes space in its default configuration, due to the way Workspaces and the Chain View UI work. Fortunately, breaking out the Code Editor into its own, maximized window is an easy workaround to this problem, and largely addresses it to my satisfaction.

Apart from these issues, I like the new UI for the Object Editor, and the Code Editor very much.

GameMaker data structures: a cautionary tale

When you work with data structures in GameMaker, you have to be very careful with references to a data structure that has been destroyed.

When you create a data structure in GMS, the ds_*_create() function returns an integer value which is the id of the data structure. You then use this id whenever working with that data structure.

When you destroy the data structure, this frees up the memory that the data structure used, and the data structure can no longer be accessed.

If you take that id that belonged to the destroyed data structure, and test to see if the data structure exists, using the ds_exists() function, it should return false.

The operative word being “should”. It might not.

Why not? Because, the GameMaker runtime reuses the ids of data structures, and if you create a new data structure, it will hand out that id that belonged to the data structure that was just destroyed.

To illustrate the example, we’ll use a ds_stack:

var a = ds_stack_create();
ds_stack_destroy(a);

var b = ds_stack_create();
show_message(string(ds_exists(a, ds_type_stack)));

You would think that ds_exists(a, ds_type_stack) would return false. But it doesn’t, because ds_stack b just reused ds_stack a‘s old id.

Apparently, the correct practice — which is not mentioned in the manual — is to immediately clear the value of a after destroying the ds_stack that it points to, like so:

ds_stack_destroy(a);
a = undefined;

If you do that, then a no longer points to an address that can potentially be assigned to new data structure, and so you’re safe, even if b has the same address as a once did.

Of course there’s still a problem if multiple variables all point to that same destroyed data structure. This is probably a somewhat rare circumstance, but could possibly by the case in some circumstances, for example if you have a global variable, or controller object, holding a data structure that is accessed by multiple instances of some common object. Keeping track of every variable that references the destroyed data structure and clearing all of them when the data structure is destroyed is not an easy thing to do.

Update: Thanks to @YellowAfterLife for the very clever tip!

In other words, do this:

//creation of stack:
a[0] = ds_stack_create();
//aliases to the stack
b = a[0]; //copy of stack id stored in a[0] -- don't do it this way!
c = a[@0]; //reference to stack id stored in a[0]

//destroy the data structure AND clear the variable
ds_stack_destroy(a[0]);
a = undefined; // this destroys the array a[], and therefore kills all references to the ds_stack.

//create a new stack, let's see what happens with our aliases
d[0] = ds_stack_create();

ds_exists(a[0], ds_type_stack); //returns false, because the array was destroyed.
ds_exists(b, ds_type_stack); //returns true, but misleadingly so, because when we created d[0], 
 //we re-used the same id that had been used by the stack referenced by a[0], 
 //and copied to b by value. 
ds_exists(c, ds_type_stack); //returns false, because c references a[0] rather than storing a copy of the id it had stored.
ds_exists(d[0], ds_type_stack); //returns true, because we created ds_stack d[0].

It’s debatable whether the re-use of handles like this is in fact a good practice, but at the moment it’s the way GameMaker works, and has worked, for years. But the discovery that they are re-used (and so soon after being destroyed) is a bit of a shocker.

More information.

The worst code I’ve ever written

Over at the GameMaker Community Forums, there’s an amusing thread where people confess to the worst code they’ve ever written. Since GameMaker is often used by newbies, it’s pretty common to see some hilarious WTF moments in code.

My favorite has been:

if fps < 60 { fps = 60; } //Fixes any performance problem!

If you’re not familiar with GameMaker, fps is a read-only variable that the engine updates to indicate the number of frames per second the engine is making. If it’s below room_speed (often 30 or 60), the game appears to stutter or lag. This happens when the hardware can’t keep up with the demands of the software…. so naturally the way to fix this to simply assert that fps is meeting target! ROFL!

I think that this code would actually compile and run without throwing errors in old GM. Despite being a read-only variable, GM would allow you to overwrite the value, not caring because the engine would simply re-calculate fps and update it again on the next step, and nothing adverse would happen. But if you were drawing fps to the screen, you would see “60” — even though the game might be lagging.

Here’s my own story:

When I was working on my game Alamogordo for Ludum Dare 29, I wanted to replicate the font used by the Atari 2600 in the game E.T. 
 
I had not heard of sprite fonts before, and had never used them. So I improvised my own system. First, I fired up E.T. in an emulator and took screen captures of the score, taking care to get all 10 digits that I would need. I then cut out the numbers and put them into a sprite resource. As I recall, I had problems with the selection size not always being the same, or being exactly centered, so it took quite a bit of time just to get the sprite set up so that it was the right size for all digits, and all the digits were positioned the same relative to the sprite origin.

Next, I wrote a script that took a number that I passed into it, converted that number into a string, then took each digit in the string and ran it through a switch statement, matching the value in the substring against a case that drew the right sub-image of my sprite that held the images of all the digits, and correctly offset them from one another, to draw the score on the screen. Only… no, I didn’t even do it like that! I actually used div to get the ones, tens, hundreds, and thousands digit, and then used that value as the subimage index to draw the sprite.

It worked beautifully, and at the time I thought it was brilliantly clever, but that there had to be a better way if only I had the time to RTFM.

I was using the variable name “finds” for storing the score because the player’s score goes up whenever they uncover something as they dig through the Alamogordo landfill, finding it, and you got a certain amount of points for each find you discovered.

///Create Event:
finds = 0;
image_index = 0;
image_speed = 0;

ones_digit = 0;
tens_digit = 0;
hundreds_digit = 0;
thousands_digit = 0;

///Draw Event:
ones_digit = finds mod 10;
tens_digit = finds div 10;
hundreds_digit = finds div 100;
thousands_digit = finds div 1000;

draw_sprite(sprite_index, ones_digit, x, y);
draw_sprite(sprite_index, tens_digit, x-sprite_width, y);
draw_sprite(sprite_index, hundreds_digit, x-(2*sprite_width), y);
draw_sprite(sprite_index, thousands_digit, x-(3*sprite_width), y);

At the time, my inspiration for the game was very last minute, I hadn’t even intended to produce a project that weekend, but the idea came to me Sunday and I ended up putting the game together in literally about 10 hours altogether. So I was just pleased that it worked on the first try. I had literally no time to experiment or read through the manual in the hopes that I would find a proper way to do it!

Lol! I recall writing that code, running it, seeing that it worked, and saying “Right, then! Good enough!” and moving on to the next thing I had to do. It’s fantastic sometimes what you can crank out when you’re only concerned with finishing on time, and don’t care about things like correctness or maintainability.

Truth be told, this is probably not my worst code I’ve ever written, but it might be the worst code that I’ve written that actually did what it was supposed to do.

Epilogue: I later learned about and used a sprite font in my Ludum Dare 36 game, Ancient Technologies. It was a much nicer way to draw the score to the screen!

GameMaker Tutorial: Instance Pooling for performance optimization

Instance pooling is a design pattern which can potentially help performance in games where you are creating and destroying a lot of instances.

If your program is spawning and destroying objects very frequently, calling the Create and Destroy Events many times per step, it’s potentially a lot of extra processing. Creating instances and destroying others constantly seems wasteful. Why destroy the instances that need to be destroyed when instead you can re-use them, and avoid having to call the Create event on a New instance every time you need one?

The Code

You can download my demo code here:

The GMS2 demo is an import of the 1.4 demo, cleaned up to remove the Compatibility scripts.

Looking at the project code, you will see that I have used inheritance to make the Control and Instance Pool test implementations as close to identical as possible. I have included telemetry code, which tracks the FPS of the game while it runs, so that performance is quantifiable. In the GMS1.4 version of the project, all of the telemetry code is neatly separated from the demo code into its own Execute Code action. This makes it easy to modify the project for your own use, and get rid of the telemetry code entirely if you don’t need to quantify runtime performance, and only want the code that actually implements the Instance Pool pattern.

How it works

The basic concept of the Instance Pool pattern is simple. The goal is to minimize the amount of times we create new instances of some object in large numbers during the game. A good candidate for objects to use Instance Pooling with would be bullets, bonuses, and enemies. Instance Pooling is particularly beneficial when the object in the pool is somewhat “heavy” — that is when the Create or Destroy events cause a lot of processing to happen.

The way we achieve this goal is by re-using already-existing instances of the object. This is done by deactivating the instance rather than destroying it. We add the id of all deactivated instances to our Pool. Then, when a new instance is needed, we first check the pool to see if an already-created but inactive instance exists, and if so, we remove it from the pool, activate it, and re-use it.

The most efficient way to create and manage our pool is with a stack. Stacks are elementary data structures in computer science. Imagine a stack of pancakes. The stack gets bigger as you add more pancakes to it. If someone orders a pancake, you take the top one off of the stack, and give it to them.

This is what’s known as Last In, First Out, or LIFO data access. This happens to be just what we need. The stack gives us an easy way to keep track of the id of all of our deactivated instances, and when we need to activate one, we just pop it off the top of the stack. This is very simple to do, and therefore very fast. In GameMaker, stacks are created by ds_stack functions. If you’ve never used them before, take a moment to read up on them. It will help you understand how the demo works.

The code at the heart of this is quite simple. It looks like this:

//First check the pool to see if it has any deactivated instances in it that we can use
 if ds_stack_empty(pool)
 {
 //If not, we need to create a new instance. No performance gain.
 instance_create(x,y,oInstancePoolBullet);
 }
 else
 {
 //If the pool has an instance we can use, take it out and activate it.
 var bullet = ds_stack_pop(pool);
 instance_activate_object(bullet);

 //Reset the state of the instance. 
 //**If** this is cheaper than a new instance, we gain performance.
 bullet.x = x;
 bullet.y = y;
 bullet.direction = direction + random_range(-20,20);
 bullet.alarm[0] = bullet.TTL;
 }

There’s only a little bit of other code that you need. You need to create the ds_stack, most likely this is best done in the Create Event, using ds_stack_create(). And when the pool is no longer needed, you need to destroy the ds_stack using ds_stack_destroy(), most likely in the Destroy Event.

Of course, we also need to push instances to the stack when they are no longer needed. To do that, we do this whenever we would ordinarily destroy the instance:

ds_stack_push(oInstancePoolPlayer.pool, id);
instance_deactivate_object(id);

So, don’t destroy instances that you want to pool; deactivate them instead. With our bullet demo, I do this by giving bullets a “time to live” and then setting an timer. When the alarm goes off, the instance’s id is added to the stack, and the instance is deactivated. Then it just waits for the game to need it. In a full game, you would need to look at other occasions where you need to deactivate the bullet, such as when it goes outside the room, off the screen, or when it hits an object.

That’s basically it. But you may need to think about some additional concerns, which I will cover in the Findings section of this tutorial.

Running The Demo

Open the project with GameMaker Studio, compile, and run.

The Demo consists of an Instance Pool demo and a Create-Destroy demo for comparison.

Press the Space bar to spawn bullets. Press Tab to switch from one demo to the other.

The FPS is displayed at the top-left of the screen. The first number is the minimum fps, the middle is the average fps over the last 30 steps, and the last number is the maximum fps. The minimum and maximum fps reset once per second. The average is a rolling average over the last second.

In the Instance Pool demo room, hold the space bar down until the first bullets to spawn reach the end of their life. At this point, the instance pool is filled, and no more instances will spawn; instead, deactivated instances will be re-used. At this point, you should notice the FPS dramatically shoots up and stays consistent.

Findings

To my surprise, I did not find that there was much benefit to creating an Instance Pool for bullets. Create and Destroy is about as fast as Instance Pooling with simple bullet objects in GameMaker. I expect the reason for this is that the GameMaker runtime engine is not particularly fast, but even when I did a YYC build, I still saw no real advantage to using an Instance Pool, at least in terms of fps.

Over a long game session, it may be that there is a reduction in memory fragmentation since we are updating values in RAM that has already been allocated, rather than rapidly allocating/de-allocating memory when we create new instances and destroy them constantly. But I haven’t tested that, so it’s merely speculation for now. Update: This benefit of reducing memory fragmentation is confirmed by Mike Dailly of YoYoGames.

In order to show a benefit to Instance Pooling, I had to weigh down the Create Event for my bullets. To do this, I ran a simple repeat loop to increment a variable. This is obviously inefficient and pretty pointless, but it serves the purpose of simulating a complicated object with an init script that takes some time to run. If that init script needs to be run only once, and not every time the instance is re-used, then there is a benefit and using the Instance Pool pattern will help.

When does it make sense to use the Instance Pool pattern? When there is a performance issue, and the Create or Destroy Events are more expensive than instance_activate_object() and instance_deactivate_object().

Setting up and managing the instance pool is pretty simple, but it does take some work, and incurs some overhead. It’s not worth it to incur this overhead unless there’s a tangible benefit in the form of noticeably improved performance.

Run the code profiler, and see where your code is spending the most time. If it’s heavy on Create and Destroy events, an instance pool might be just what the doctor ordered. Otherwise, you may want to look elsewhere for your low framerate fix.

Additional Considerations

As I mentioned, there are a few other considerations that you should think about when implementing an Instance Pool, which I will discuss here.

Should we Prime the pool?

In my demo, we only create new instances when there are none in the stack. This means that until we’ve deactivated our first instance, the stack is empty, and there is no performance gained by having it.

In fact, since we’re checking the stack before we create each new instance, there’s actually an infinitesimal hit to performance. When you run the Instance Pool room, we see pretty much the same fps performance as we did in the Create-Destroy room, until the first bullets start to be recycled. Only then do we see fps shoot up.

Well, what if we want the performance to be high from the very first bullet? We can do that, by priming the stack, by creating a bunch of bullets, and then immediately deactivating them and pop their id’s onto the stack.

We could create a special object that we might call oPoolPrimer, which lives for several steps, creates the instances we need and deactivates them, adds them to the Instance Pool stack, and then destroys itself when its work is done.

The best time to do this is when the performance hit won’t be noticed, such as when the game is in a menu screen. Alternately, we can create the instances gradually, over a longer time than would introduce a noticeable performance penalty.

To be effective, you will need to have a good way of calculating maximum the number of instances you need to have active in your game at any given time. Prime your pool with that many instances. That way, even when you have all of them active, you aren’t creating new ones, and your fps will stay high.

Trim the pool?

One of the downsides of the Instance Pool is that all those deactivated instances take up resources. Even though the CPU may not be spending as much time with those instances, they do incur some processing overhead to manage even when disabled, and as well they use some RAM.

Depending on your game, you might have a moment when you need a huge number of instances active, but in other parts of the game the action isn’t as intense, and you won’t need so many. For example, in my demo, I spawn 100 bullets per step, for 20 steps, resulting in some 2000 instances max if you hold the space bar down the entire time. But if you don’t need to shoot all the time, all those disabled bullets end up in the stack. Do you really need 2000 disabled instances? If there isn’t going to be as much shooting going on, you might not. We can free up resources by trimming the stack every so often.

One way to do this would be to set a recurring alarm so that every few seconds, the stack is trimmed if it goes over a certain size.

///Alarm0 Event:
while ds_stack_size(pool) > trim_limit
{
 //remove the top instance from the stack and destroy it
 with ds_stack_pop(pool) {instance_destroy();}
}
alarm[0] = reset;

This will keep the stack small when it doesn’t need to be so big.

Delete the pool?

If you delete the stack, you should realize that any disabled instances that we were tracking in the stack still exist. They will continue to do so until the game ends, or you change rooms. If you don’t change rooms right away for some reason, you may want to run through the stack before you destroy it, popping all the instances out of them so that they can be destroyed as well. Otherwise, those inactive instances will continue to take up resources.

while !ds_stack_empty(pool)
{
 //remove the top instance from the stack and destroy it
 with ds_stack_pop(pool) {instance_destroy();}
}
ds_stack_destroy(pool);


Benefits in network multiplayer games

This comes from GMC Forums user JuJu: There’s a nice implicit benefit of instance pooling: It makes handling multiplayer netcode for complicated scenes easier if you can refer to instances by a common index across all machines.

GameMaker Studio 2 impressions: importing from GMS1.4

YoYoGames announced a game jam to celebrate the GMS2 Beta a couple weeks ago, and I’ve decided to try to participate. I don’t have a lot of time to work on my project, but I wanted to do something to warm up for Ludum Dare 37 anyway, so this was just the excuse I needed.

Since I’m short on time, and am very interested to see how well the GMS1.4->2.0 import feature is, I decided to work on an update to my LD35 entry, Shape Struggle.

Import and Compatibility Report

First, I made a copy of my source code. Then I imported it into GMS2, which was easy. A few seconds later, the project had been converted.

Immediately, GMS2 presented me with a Compatibility Report which details all the conversions it had to make, and the report itself appears as a file in my project resource tree under Notes.

Mostly, the conversion report details involves replacing calls to obsolete functions with compatibility scripts that do the equivalent thing. In my case, the game converted nicely, and I was able to build and run it without any problems. But, I expect that if the conversion process ran into problems, perhaps a function call that it could not convert to GMS2, the Compatibility Report would make mention of this, and I might have some additional work to do before the project would run.

YYG’s documentation says that the compatibility scripts should NOT be messed with, they are not intended to be human editable, so I haven’t tried messing around with them, but it leaves me curious about what might happen if I did. Not being able to go into these functions and make changes makes me question how maintainable an imported project is; and if it is not very maintainable, it mostly defeats the purpose of importing and converting an old project.

I haven’t done enough yet to know whether this is a legitimate concern or not, but it’s a worry for now until I know more. It seems to me that in order to have complete control over your project code, you’ll eventually need to go through and re-write any code that makes calls to compatibility scripts, to do the equivalent thing in a manner which is completely native to the way GMS2 wants things done. In many cases, this could be a simple and straightforward transliteration of the old code into new code which eliminates deprecated functions. Depending on the project size, though, this could get very tedious.

Update: Reading the Help documentation more carefully, I misread. Only compatibility scripts starting with a double underscore should be left alone. From looking at the compatibility scripts that I have reviewed so far, it seems like a fairly straightforward wrapping — the old, deprecated function call is used to create a script of the same name, and the script calls the equivalent GMS2 GML function(s) needed to achieve the equivalent results. It should (in principle) be possible to replace the call to the compatibilty script with the code inside of the compatibility script, and thereby convert the project to pure GML2. This does not apply to __compatibility scripts, however. If your project converts with these, it may be necessary to rewrite your project a different way to make it pure GML2. Or you may be able to leave it alone and hope that you don’t need to maintain that part of the project.

Collision Mask problems

Although my project would build and run, the conversion process was not 100% perfect. I noticed that some objects seemed to be colliding in a way that indicated that there was a problem with their collision masks. Sure enough, when I went into the Sprite Editor to have a look, I found that the collision masks were all wrong.

Upon further investigation, I determined that the only type of collision mask that currently works in GMS2 is a rectangle mask. Diamond, Ellipse, Precise, and Precise Per Frame masks are available options, but when I use them none of them work — collisions do not register and no event happens.

Moreover, I found that the collision mask editor does not seem to draw the mask shapes very well. When I tried to draw an ellipse mask, the right and bottom edges of the ellipse were flattened. I spent a lot of time trying to re-draw them to fix this problem, but the editor just overrides what I try to draw, and there’s no way to override it.

What’s more, if I tried to adjust the Alpha Tolerance on the mask, it would reset the mask to fill the entire sprite.

Very likely these are bugs due to the software still being in Beta status, and will not be long-term issues with the import process once GMS2 is officially released from Beta. So, clearly, the Sprite Editor has some issues and a long way to go before it is ready for release, including features which apparently have yet to be implemented.

Image Editor WTFs (Woes To Fix)

I also had a lot of problems with getting used to the new Image Editor. Most of this is a matter of UI polish, but there’s so much that is familiar, yet different, in the Image Editor UI that it’s giving me a lot of frustration. I fully understand the need for a user interface to change over time, but I do not understand many of the changes that have been made with the Image Editor. It’s tough to even know how to formulate my questions about them.

I find that Select and Copy operations don’t behave like I’d expect them to — copy creates a new Brush in m brushes palette. I can’t simply paste the pixels I’ve selected, and expect them to appear in the image at the position where I copied them from. This makes aligning static elements appearing in different frames in an animation a huge pain. Unless I’m missing something. Yes, there’s onion skinning, which is a great feature to have, but I don’t want to have to do painstaking image placement, I want to simply paste and see the content draw in where it was in the frame where I copied it from.

There’s also no replace color tool in the new Image Editor. In the GMS1.x Image Editor, there used to be a handy tool that would replace all pixels in the image matching the color you clicked on with the color set in the tool. For example, you could turn all red pixels green, with a single click. This was a useful tool, and I miss it.

I find the Text Tool in the Image Editor to be in need of a great deal of additional refinement. Currently, it is not very usable. I need to be able to reposition the text after I’ve typed it, but before committing. Most modern graphics editors allow this, but in GMS2’s Image Editor, once you click, there doesn’t appear to be any way to move the text that you’ve started typing, which makes positioning it correctly largely a matter of guesswork. There’s also no font preview, so when you select from the list of font names, unless you’re already familiar with the font in question, you won’t know what it looks like until you start using it. Currently it’s a huge pain to use the Text Toolf.

Summing up

Still, overall I’m very pleased that the code conversion process resulted in a project that could compile and run without throwing errors. There are still issues that need to be resolved, namely problems with sprite collision masks not coming through correctly in the conversion. And a lingering question about how maintainable an imported project is, if we cannot touch the compatibility scripts. I expect in time, with some more experience with converting projects, it will become apparent what the best approach to take is with modifying a game after importing it from 1.4.

Fun enum ideas for game development

Most video games have a counting, ranking, or level system of some sort. It’s often good to have a thematic flavor to your counting systems. This way, rather than calling your level progression by boring old regular numbers, you can give each level number a meaningful, or flavorful, name. This can add character or meaning to your game world, or it can be used to help disguise the underlying math, resulting in a game where the underlying mechanics are masked away from the player, leading to a more mysterious experience where they need to experiment and discover. What’s cooler: a “level 3 sword?” Or “the sword of autumn?” What’s more powerful: the knight sword or the rook sword?

To that end, I thought I’d demonstrate a few example enums that you can use to spice up your game design.

ENUMerate all the things!

Alphabet {A, B, C, D, E, F, G, H, I, J, K, L, M, N, O, P, Q, R, S, T, U, V, W, X, Y, Z}

Greek Alphabet {Alpha, Beta, Gamma, Delta, Epsilon, Zeta, Eta, Theta, Iota, Kappa, Iota, Kappa, Lambda, Mu, Nu, Xi, Omicron, Pi, Rho, Sigma, Tau, Upsilon, Phi, Chi, Psi, Omega}

Military Phonetic Alphabet {Alpha, Beta, Charlie, Delta, Echo, Foxtrot, Golf, Hotel, India, Juliett, Kilo, Lima, Mike, November, Oscar, Papa, Quebec, Romeo, Sierra, Tango, Uniform, Victor, Whiskey, Xray, Yankee, Zulu}

Army (simplified) {Private, Specialist, Corporal, Sergeant, Officer, Lieutenant, Captain, Major, Colonel, General}

Navy (simplified) {Seaman, Petty Officer, Ensign, Lieutenant, Commander, Captain, Admiral}

Chess {Pawn, Knight, Bishop, Rook, Queen, King}

Rainbow {Red, Orange, Yellow, Green, Blue, Indigo, Violet}

Elements {Earth, Air, Fire, Water}

CardRank {Two, Three, Four, Five, Six, Seven, Eight, Nine, Ten, Jack, Queen, King, Ace, Joker}

CardSuit {Clubs, Diamonds, Hearts, Spades}

Zodiac {Aquarius, Pisces, Aries, Taurus, Gemini, Cancer, Leo, Virgo, Libra, Scorpio, Sagittarius, Capricorn}

Seasons {Spring, Summer, Autumn, Winter}

Months {January, February, March, April, May, June, July, August, September, October, November, December}

Weekdays {Sunday, Monday, Tuesday, Wednesday, Thursday, Friday, Saturday}

Lunar Cycle {New, WaxingCrescent, FirstQuarter, WaxingGibbous, Full, WaningGibbous, ThirdQuarter, WaningCresent}

Some of these may not necessarily have a natural order to them, but might just be a set of categories which you could use to organize something in your game. That something could be worlds, or items, or creature types, or powers, or anything else you can think of.

What else?

What else is there? Probably a whole lot! You could probably make a good basis for a game system out of gemstones, or metals, or barnyard animals, or anything, really!

If you know of a set of things that would make a good enum that I’ve left out, leave a comment below.

Using enums in GameMaker Studio

Enums are covered in the manual in the article on Data Types.

The basic syntax is as follows:

First, you have to declare the enum.

enum <variable>{<constant> [= <value>]}

You create the enum using the enum keyword, naming the enum <variable>. Then, in brackets, you list all the constants that make up the values in the enum. You can explicitly declare values for the enum constants, or you can leave them implied, in which case GameMaker will assign them integer values starting at 0, and increasing in order through the collection. You can even use expressions rather than a static value.

To access the enum constants, you use the syntax enum_variable.constant.

In your code, there are all kinds of situations where using an enum is potentially useful. Here’s a few things to look for in your code that might signal a good opportunity to use an enum:

Conditionals for checking state

Consider the following ways of checking the state of some object:

//check state using string matching
if state == "state_idle" {//do state actions}
//check state using literal numbers
if state == 0 {//do idle actions}
//check state using variable
state_idle = 0;
[...]
if state == state_idle {//do state0 actions}
//check state using enums
if state == enum.value {//do state actions}

Out of these, using enums is the best approach. Why are enums better?

Conditional checking by string matching is much slower than number matching. Your string value provides semantic meaning to the reader, making the code easier to understand when a human reads it. But when the program goes to check the conditional, it has to check every letter in both strings to see if they match.

As well, this approach is fairly error prone. It’s very easy to type the strings in slightly wrong. If you’re not careful, it’s easy to type one string where the state is assigned, and another string value where you’re checking state in order to do something state-specific. If you don’t catch the error, you’ll have a hard to diagnose bug because the conditional check won’t match what you’ve set the state variable to. One extra space, or misspelled word, or inconsistent use of capital letters, and the string match check will fail. The compiler won’t help you catch this sort of bug.

It’s a lot faster to do conditional checking via numbers. But naming your states with literal numbers: 0, 1, 2, etc. provides no meaning. Is 0 the idle state? is 1 running? is 2 jumping? Keeping track of this stuff in your head makes your work as a programmer harder, and makes the code hard to read, and brittle. You can do slightly better by creating a named variable and assigning the number value to it. The named variable can be expressive, e.g. state_idle = 0, state_running = 1, etc. But variables values can change, and storing each value takes a little bit of memory. By contrast, an enum value is constant — it cannot be changed once it is declared. And enums are global, so they are only declared and set in memory once, and thus require fewer resources. Even if you have ten thousand instances that use your enum, the memory used by them is the same as if there is only once instance.

Create an enum that provides expressive labels on these values, and you have the best of both worlds: expressive code that checks conditions fast, and uses computer resources efficiently.

Iteration over a set

Conventionally, programmers often rely on conventional looping variable names such as i or j to iterate over a collection of things, such as the members of an array, or other data structure. While this is OK, you can make your code more expressive by using enums to denote important numbers.

For example, it’s common for programmers to use a nested for loop iterating over the variables i and j to create a grid structure. Instead of using i and j, we can use variables named row and column instead. As we iterate over the range of rows and columns, we can use enums as flags to do something special at row (or column) == enum.constant.

Another example:

Say we want to implement an inventory equipping system for the player. The character has inventory slots for head, body, gloves, right hand, left hand, shoes. We decide to create an array, called inventory[], and assign the equipped item in each slot.

We could simply index the array with numbers:

inventory[0] = hat;
inventory[1] = armored_breastplate;
inventory[2] = iron_gauntlets;
inventory[3] = sword;
inventory[4] = empty;
inventory[5] = double_jump_boots;

Now, it’s not too hard to tell what each inventory slot is for. But it’s not as easy as it could be, either. Is the sword in the left hand or the right hand?

Let’s use an enum, and make the code easier understand.

enum inv_slots{head, body, gloves, right_hand, left_hand, shoes};

inventory[inv_slots.head] = hat;
inventory[inv_slots.body] = armored_breastplate;
inventory[inv_slots.gloves] = iron_gauntlets;
inventory[inv_slots.right_hand] = sword;
inventory[inv_slots.left_hand] = empty;
inventory[inv_slots.shoes] = double_jump_boots;

Now, it’s quite easy to see that the double_jump_boots are being worn on the player’s feet, rather than being carried in the player’s hands. It’s simple to keep track of which slot is which.

Creating a set of related, named values

Here’s a useful enum for direction angles for a top-down game:

enum compass {e = 0, ne = 45, n = 90, nw = 135, w = 180, sw = 225, s = 270, se = 315};

It’s much easier to remember and understand direction = compass.sw instead of direction = 225. You can use this enum for 4-direction and 8-direction movement or aiming, and you could even expand upon it if you wanted by adding constants for ene, nne, nnw, wnw, wsw, ssw, sse, and ese, like so:

enum compass {
 e = 0, 
 ene = 22.5, 
 ne = 45, 
 nne = 67.5, 
 n = 90, 
 nnw = 112.5
 nw = 135, 
 wnw = 157.5
 w = 180, 
 wsw = 202.5
 sw = 225, 
 ssw = 252.5
 s = 270, 
 sse = 292.5
 se = 315,
 ese = 337.5
 };

(I like to format my code like this; lining up the variable names, equals signs, and values makes it easy to scan down the file, and makes it clear that these values are all related.)

If I wanted, I could go a step further and use radians to make it clearer that these values are fractions of a circle:

enum compass {
 e = 0, 
 ene = radtodeg(pi * 0.125), 
 ne = radtodeg(pi * 0.25),
 nne = radtodeg(pi * 0.375), 
 n = radtodeg(pi * 0.5), 
 nnw = radtodeg(pi * 0.625),
 nw = radtodeg(pi * 0.75),
 wnw = radtodeg(pi * 0.875),
 w = radtodeg(pi), 
 wsw = radtodeg(pi * 1.125),
 sw = radtodeg(pi * 1.25),
 ssw = radtodeg(pi * 1.375),
 s = radtodeg(pi * 1.5),
 sse = radtodeg(pi * 1.625,
 se = radtodeg(pi * 1.75),
 ese = radtodeg(pi * 1.875)
 };

You can group together, and name other values that go together in a system using enums in this way, too.

Parting thoughts

Hopefully, these examples will help you see how enums can be useful to make your code more expressive, easier to read, and easier to maintain. Look for opportunities to use them in your code. They can really help!